


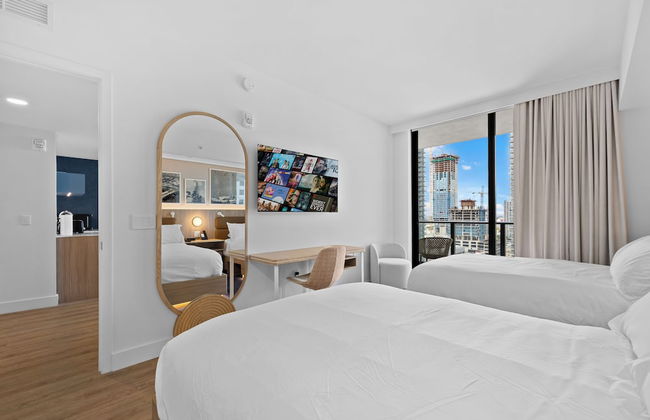
Stunning Lux 2 Bed 2 Bath with Panoramic View from Balcony
Miami - Downtown Miami - 380 m vom Zentrum
- 137 M2
- 2 Schlafzimmer
- 6 Personen
- Klimaanlage
- Heizung
- Terrasse
- Schwimmbad
- Parkplatz
- Fahrstuhl
- Garten


X Lounge III-Modern Corner Residence
Miami - Downtown Miami - 360 m vom Zentrum
- 135 M2
- 3 Schlafzimmer
- 8 Personen
- Klimaanlage
- Heizung
- Terrasse
- Schwimmbad
- Parkplatz
- Garten
- Barbecue


Luxe Ventures Miami
Miami - Downtown Miami - 390 m vom Zentrum
- 44 M2
- 1 Schlafzimmer
- 4 Personen
- Klimaanlage
- Heizung
- Terrasse
- Schwimmbad
- Parkplatz
- Fahrstuhl
- Garten


City Skyline Views & Rooftop Pool at District 225
Miami - Downtown Miami - Im Zentrum
- 80 M2
- 1 Schlafzimmer
- 4 Personen
- Klimaanlage
- Heizung
- Terrasse
- Schwimmbad
- Parkplatz
- Fahrstuhl
- Barbecue


Amazing Studio - Downtown Miami WorldCenter area - Bayside View
Miami - Downtown Miami - 400 m vom Zentrum
- 45 M2
- 1 Schlafzimmer
- 4 Personen
- Klimaanlage
- Heizung
- Terrasse
- Schwimmbad
- Parkplatz
- Fahrstuhl
- Garten


Luxury City Views in Downtown Miami
Miami - Downtown Miami - Im Zentrum
- 73 M2
- 2 Schlafzimmer
- 6 Personen
- Klimaanlage
- Terrasse
- Schwimmbad
- Fahrstuhl
- Garten
- Barbecue


On The 49th Floor! Condo on Highest & Free Parking
Miami - Downtown Miami - 380 m vom Zentrum
- 84 M2
- 2 Schlafzimmer
- 6 Personen
- Klimaanlage
- Terrasse
- Schwimmbad
- Parkplatz
- Fahrstuhl
- Garten


Free Parking! PH Luxury 3BR in Downtown Miami
Miami - Downtown Miami - 380 m vom Zentrum
- 116 M2
- 3 Schlafzimmer
- 8 Personen
- Klimaanlage
- Terrasse
- Schwimmbad
- Parkplatz
- Fahrstuhl
- Garten


Extraordinary Studio in Downtown Miami with incredible views
Miami - Downtown Miami - 400 m vom Zentrum
- 60 M2
- 2 Personen
- Klimaanlage
- Terrasse
- Schwimmbad
- Parkplatz


Lux Downtown Miami w Free Parking
Miami - Downtown Miami - 380 m vom Zentrum
- 114 M2
- 3 Schlafzimmer
- 8 Personen
- Klimaanlage
- Terrasse
- Schwimmbad
- Parkplatz
- Fahrstuhl
- Garten


Nomada Residences - District 225
Miami - Downtown Miami - Im Zentrum
- 73 M2
- 2 Schlafzimmer
- 6 Personen
- Klimaanlage
- Heizung
- Schwimmbad
- Parkplatz
- Garten
- Barbecue


Modern Condo Steps from Bayside & Kaseya Center
Miami - Downtown Miami - 220 m vom Zentrum
- 77 M2
- 2 Schlafzimmer
- 6 Personen
- Klimaanlage
- Terrasse
- Schwimmbad
- Parkplatz
- Fahrstuhl
- Garten
- Barbecue


From 43th Floor a Luxury Condo Awaits For You!
Miami - Downtown Miami - 380 m vom Zentrum
- 116 M2
- 3 Schlafzimmer
- 8 Personen
- Klimaanlage
- Terrasse
- Schwimmbad
- Parkplatz
- Fahrstuhl
- Balkon
- Garten
- Tv
- Handtücher
- Bettlaken


Ocean Front Condo Near Cruise Port, Bayfront Park, plus Free Parking
Miami - Downtown Miami - 380 m vom Zentrum
- 139 M2
- 4 Personen
- Klimaanlage
- Terrasse
- Schwimmbad
- Parkplatz


Deluxe 2 bed with Amazing views
Miami - Downtown Miami - 400 m vom Zentrum
- 600 M2
- 2 Schlafzimmer
- 6 Personen
- Klimaanlage
- Terrasse
- Schwimmbad
- Parkplatz


Downtown Studio Apartment
Miami - Downtown Miami - 320 m vom Zentrum
- 40 M2
- 2 Personen
- Klimaanlage
- Schwimmbad
- Parkplatz
- Garten


1Bd Top Location Downtown Miami
Miami - Downtown Miami - 220 m vom Zentrum
- 79 M2
- 1 Schlafzimmer
- 4 Personen
- Klimaanlage
- Heizung
- Terrasse
- Schwimmbad
- Fahrstuhl


Modern 2BR-2BA in Downtown
Miami - Downtown Miami - 400 m vom Zentrum
- 100 M2
- 2 Schlafzimmer
- 6 Personen
- Klimaanlage
- Heizung
- Terrasse
- Schwimmbad
- Parkplatz
- Fahrstuhl
- Garten


Luxury Downtown Studio - Pool & Gym
Miami - Downtown Miami - 230 m vom Zentrum
- 33 M2
- 2 Personen
- Klimaanlage
- Terrasse
- Schwimmbad
- Parkplatz
- Fahrstuhl
- Barbecue


MVR Skyline Luxury in Downtown Miami
Miami - Downtown Miami - 380 m vom Zentrum
- 65 M2
- 1 Schlafzimmer
- 4 Personen
- Klimaanlage
- Schwimmbad
- Fahrstuhl