5382 Wohnungen in Cumbria
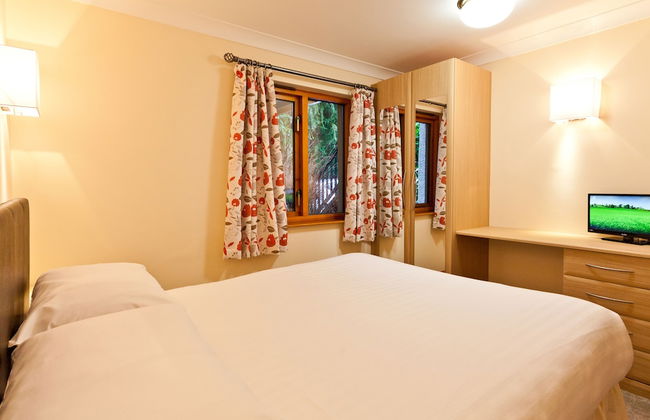
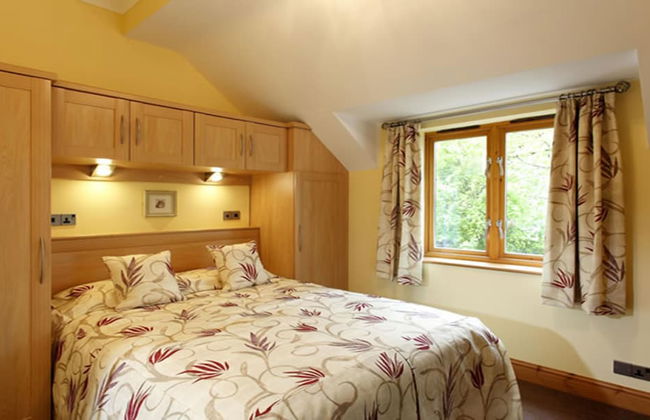
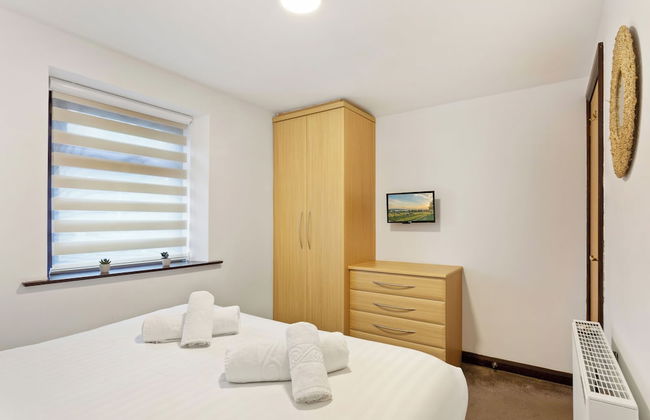
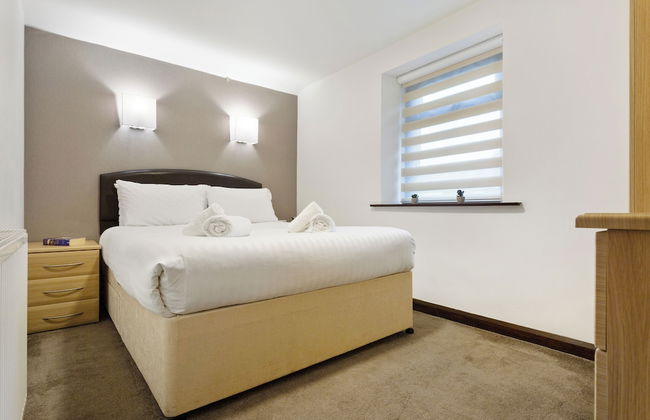
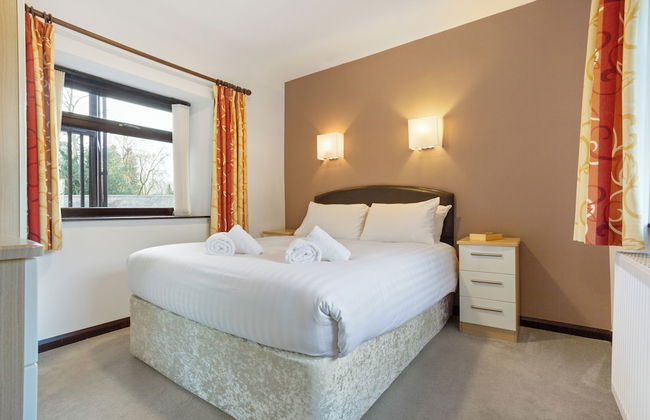
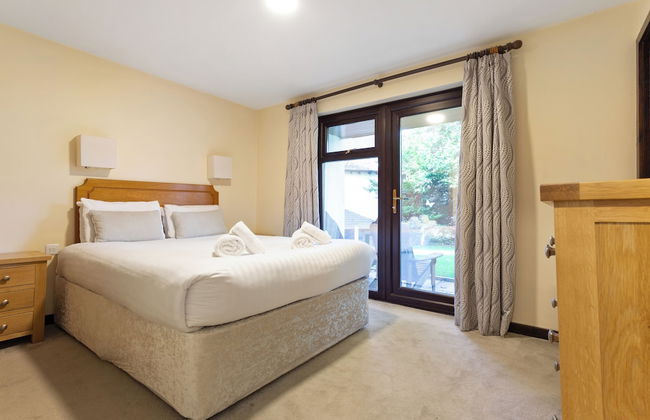
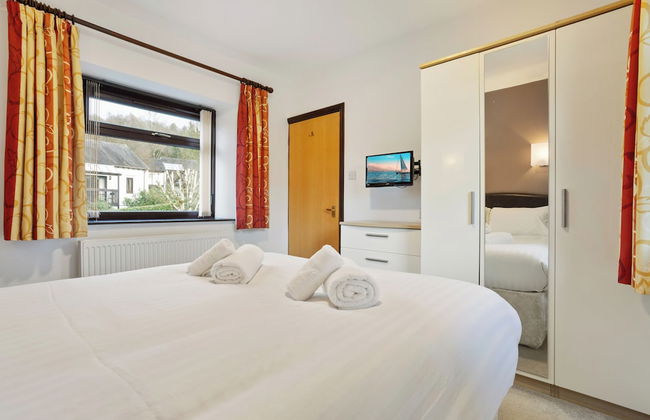
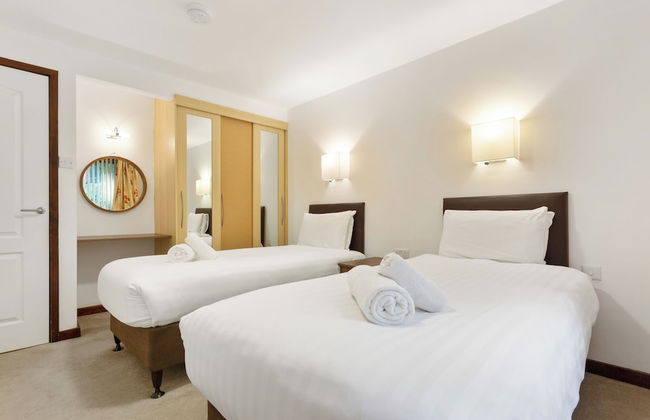
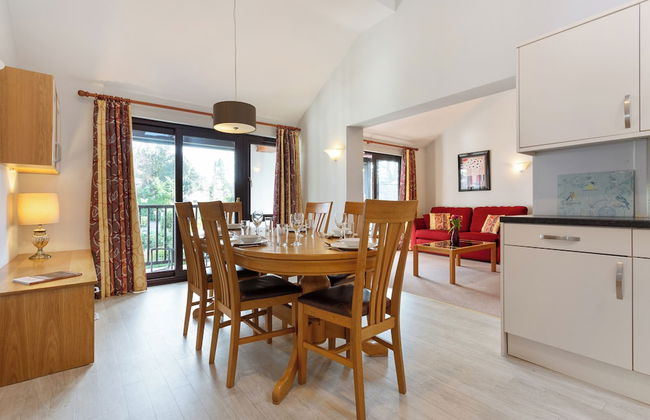
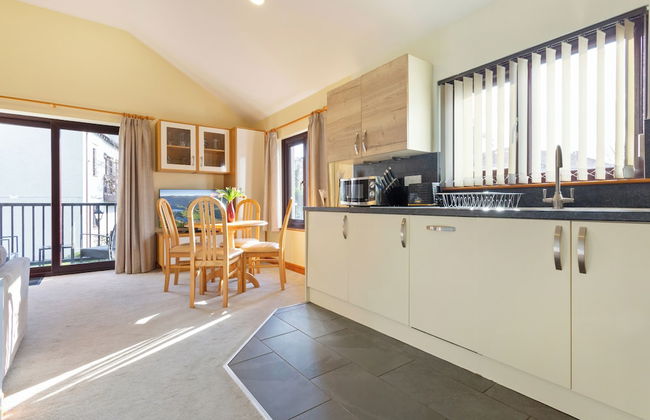
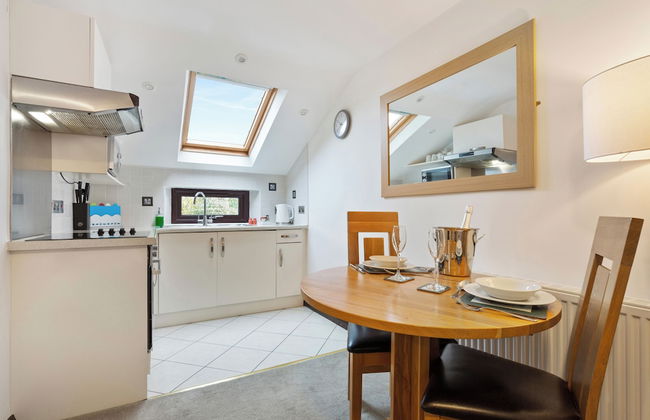
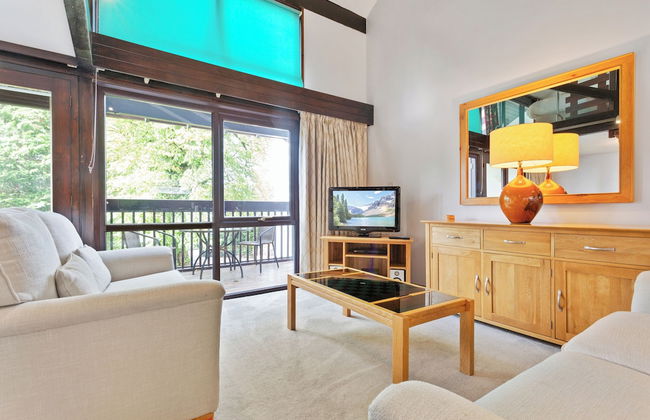
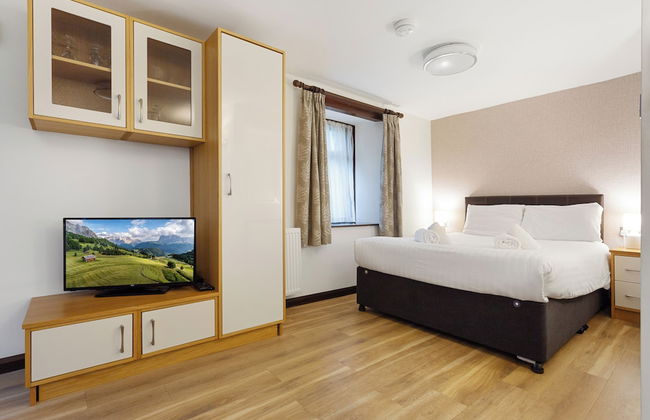
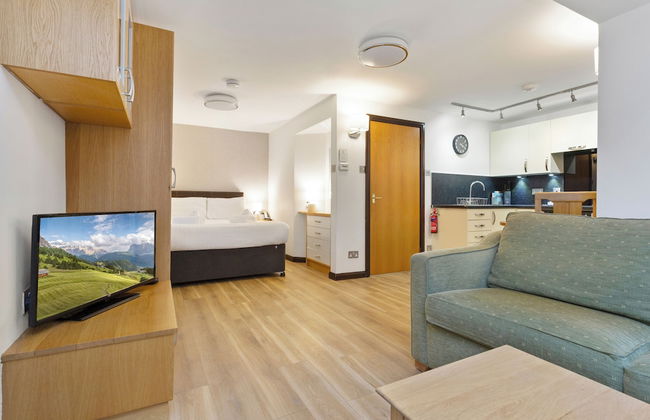
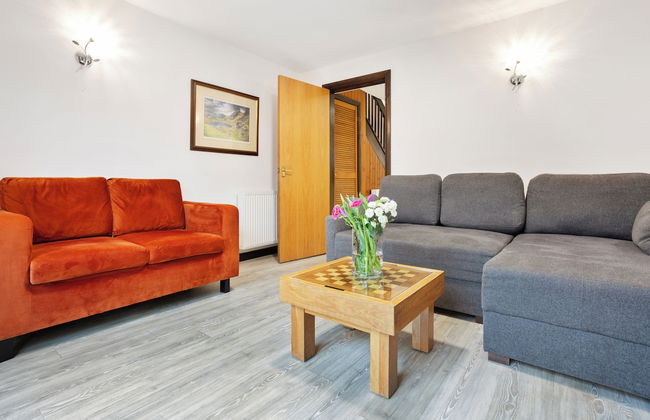
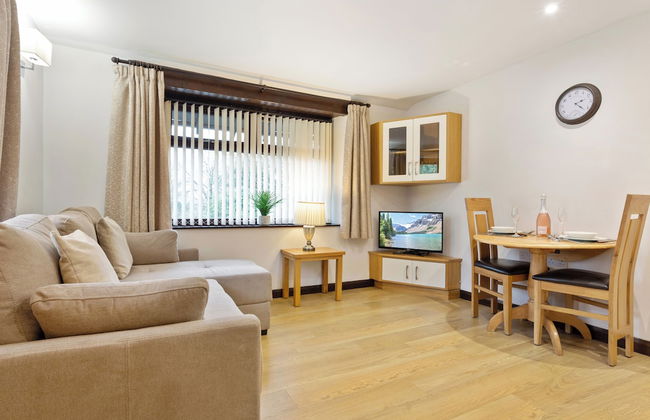
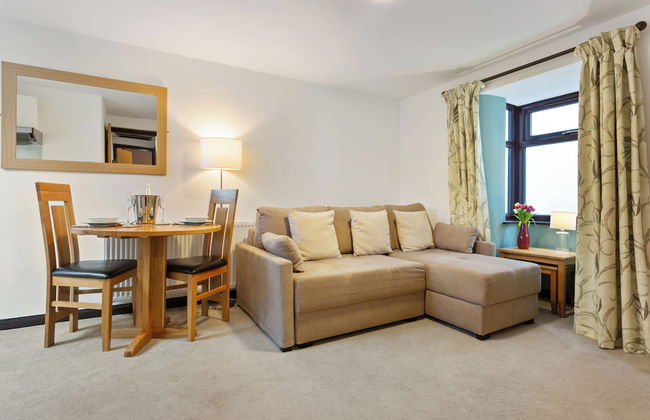
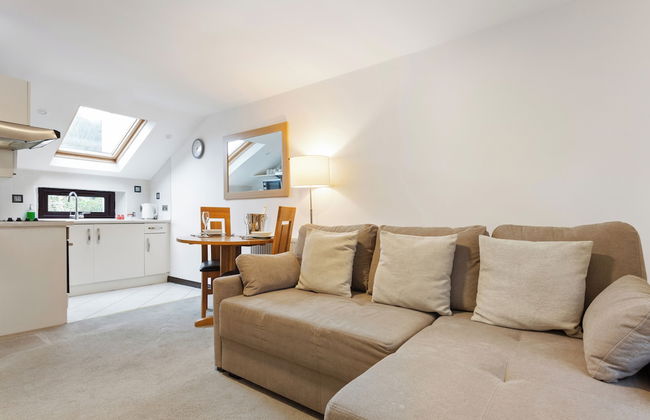
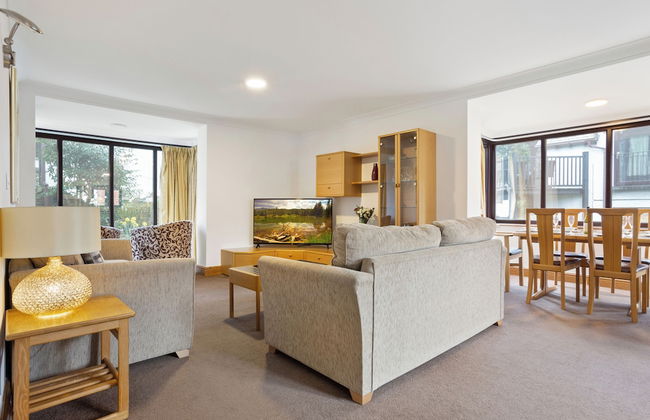
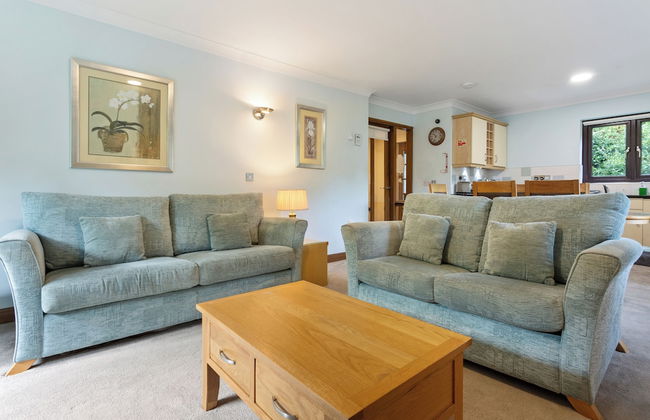
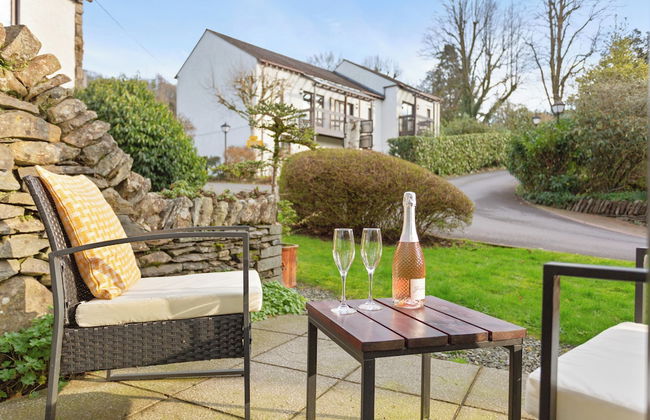
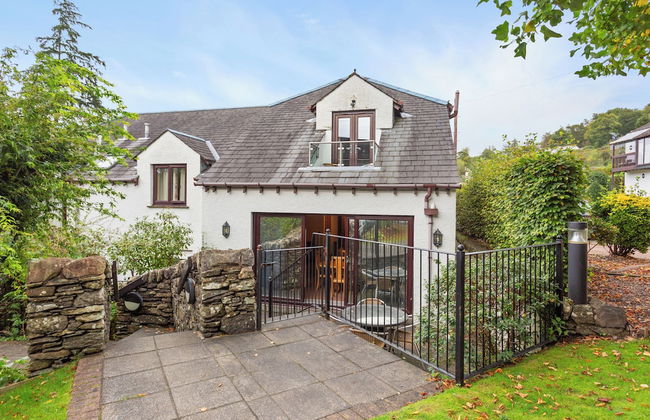
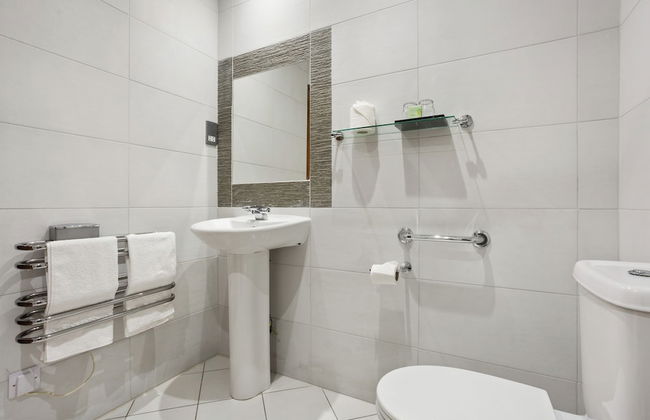
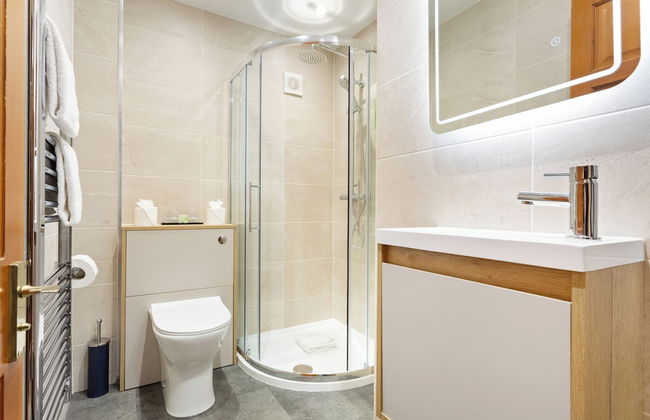
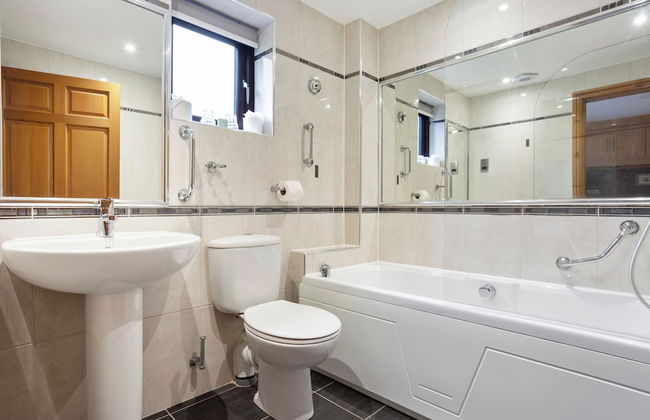
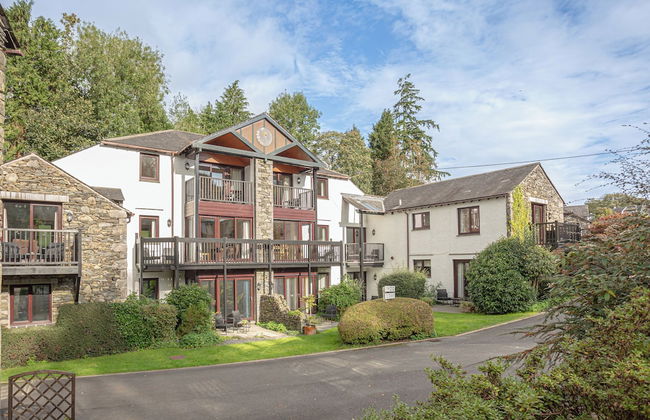
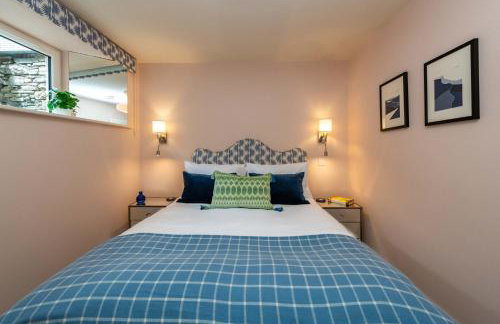
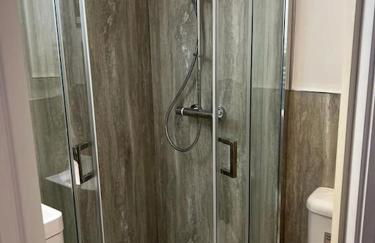
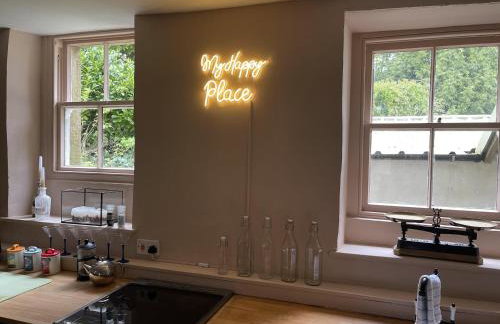
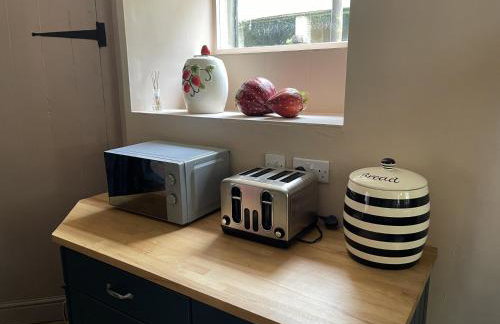
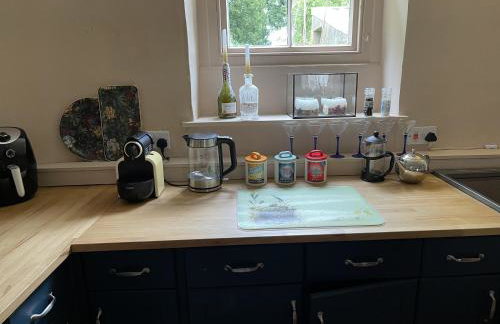
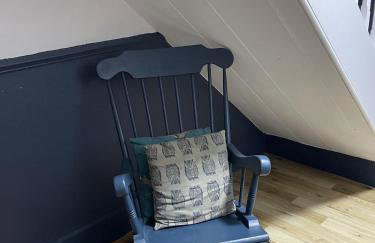
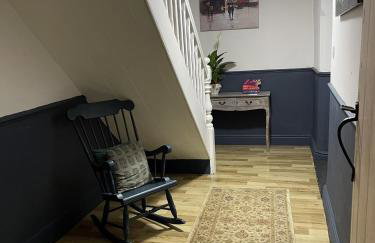
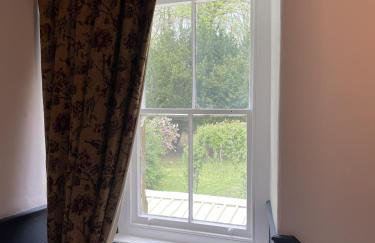
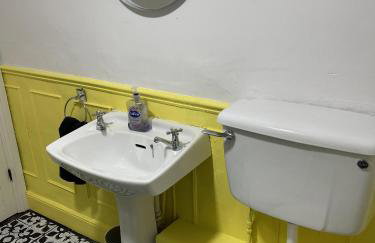
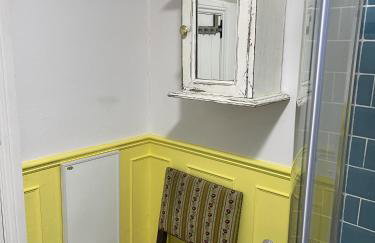
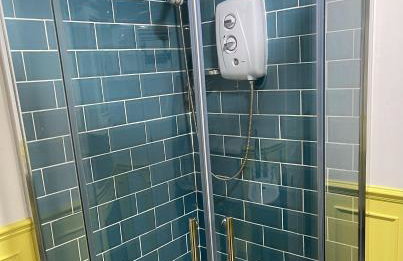
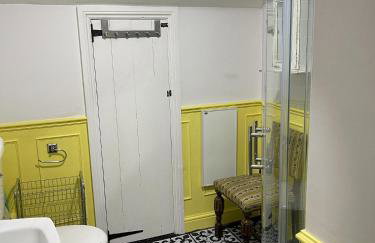
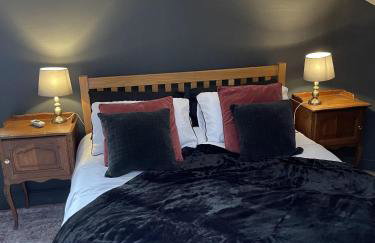
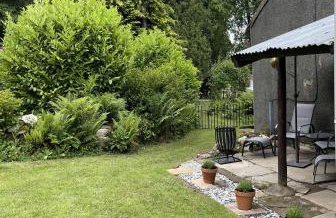
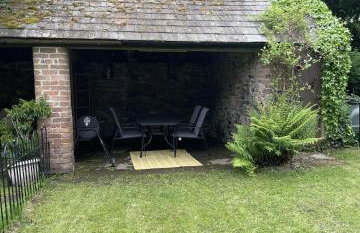
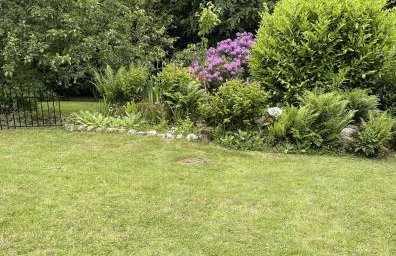
Lindeth Fell Country House - Foto 1
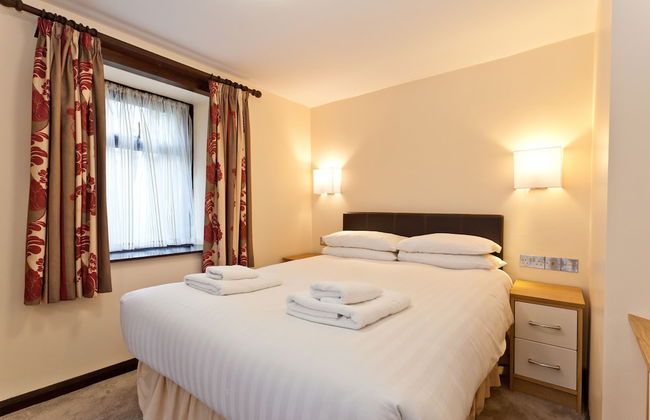
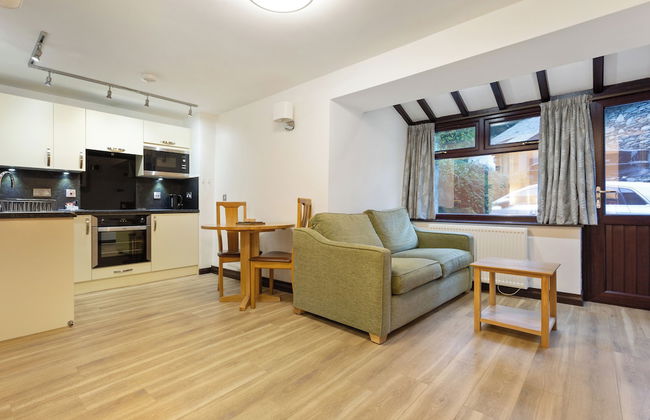
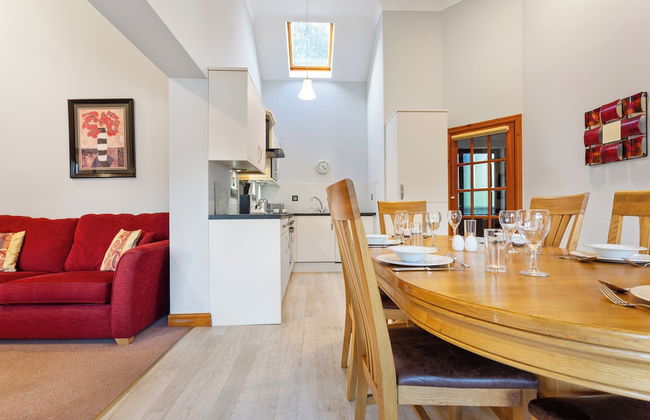
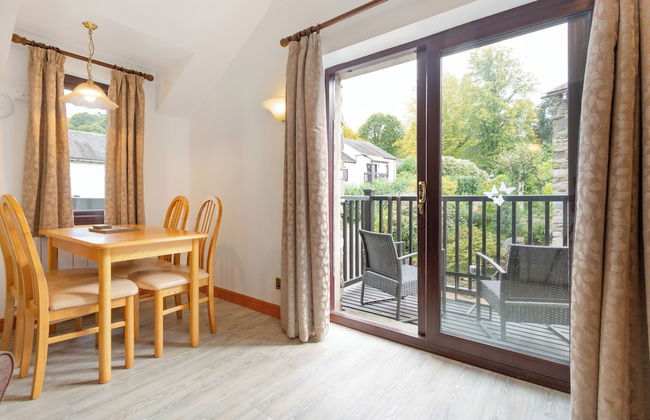
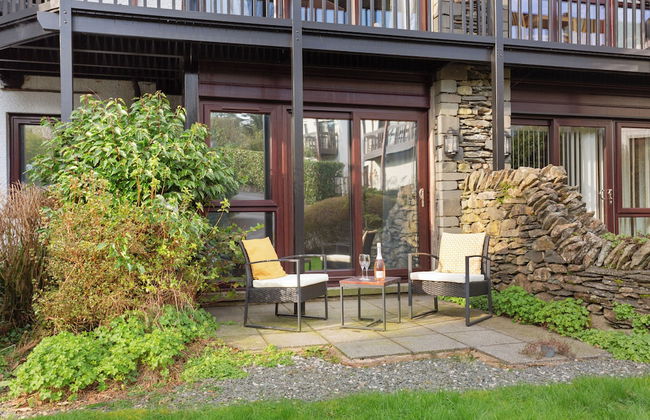
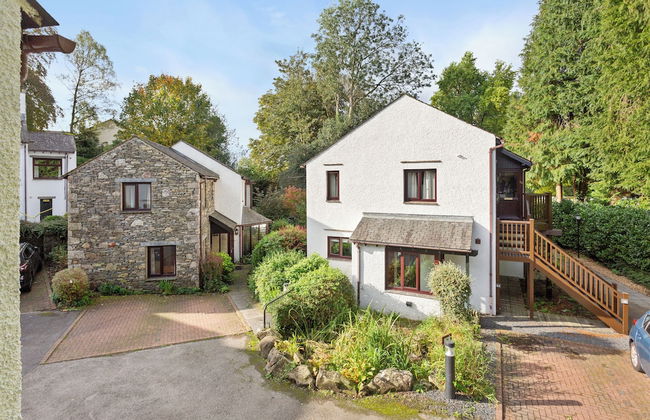
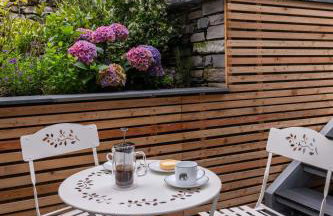
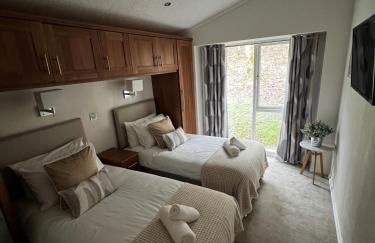
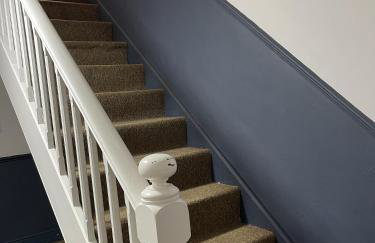
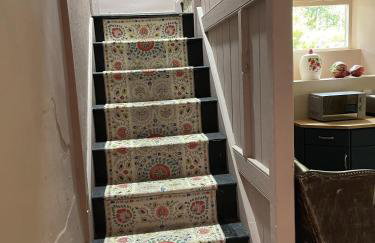
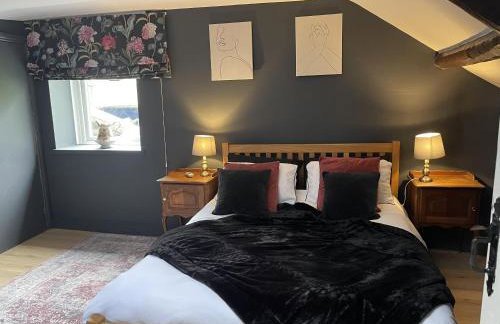
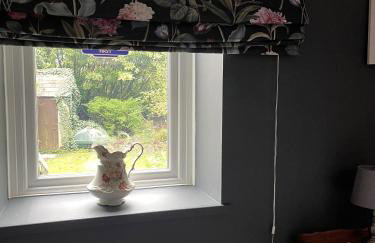
Lindeth Fell Country House - Foto 2
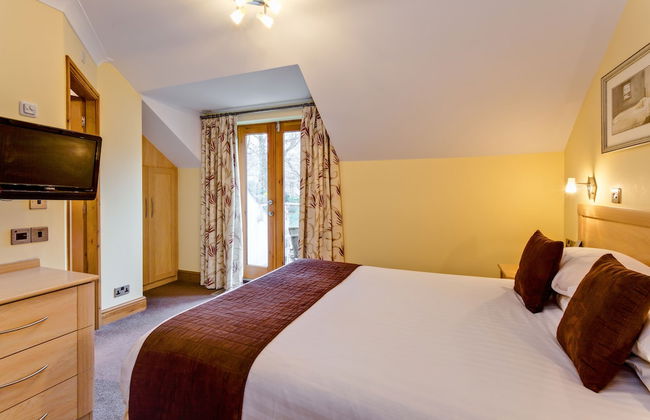
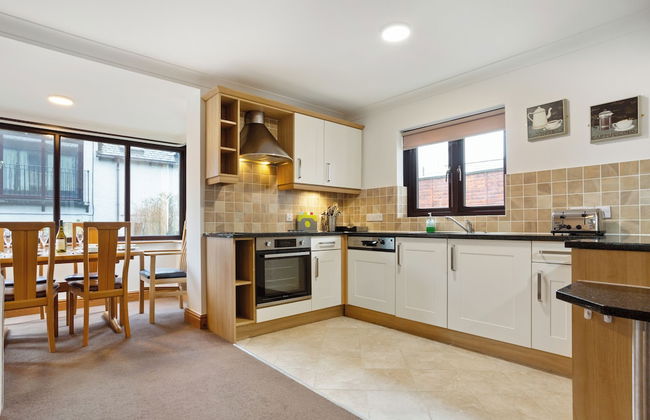
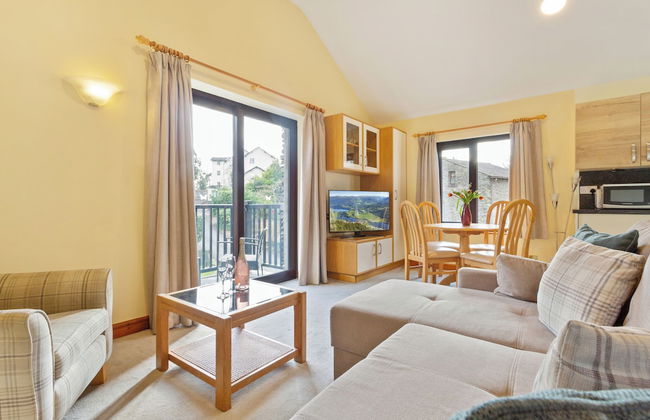
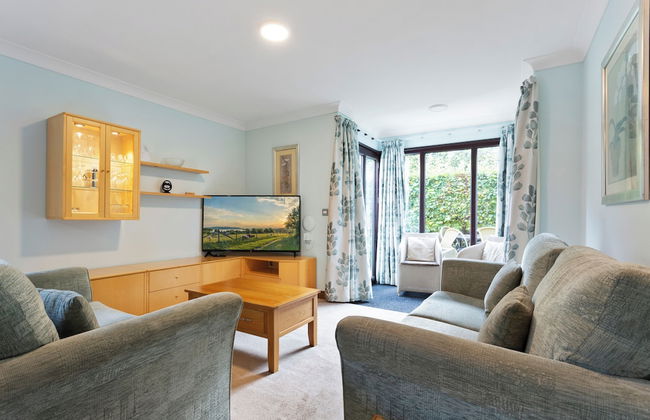
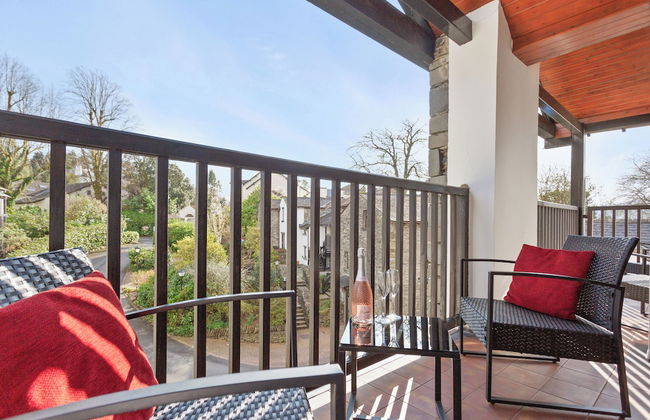
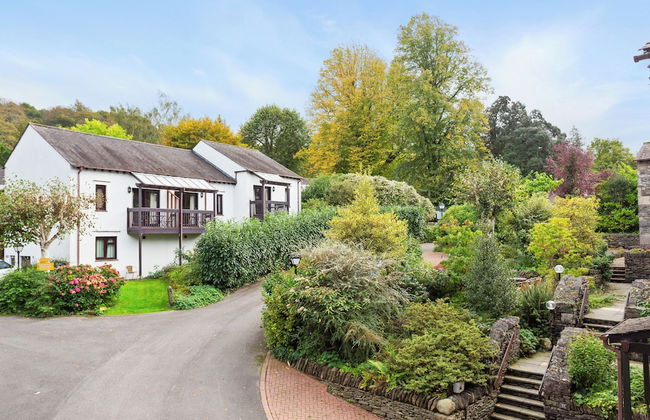
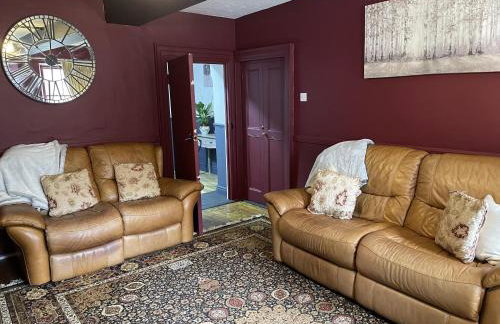
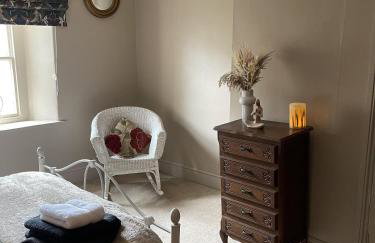
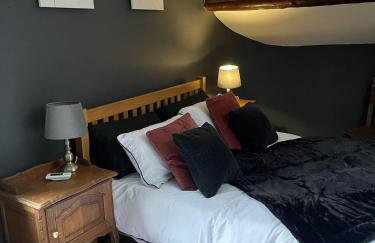
Lindeth Fell Country House - Foto 3
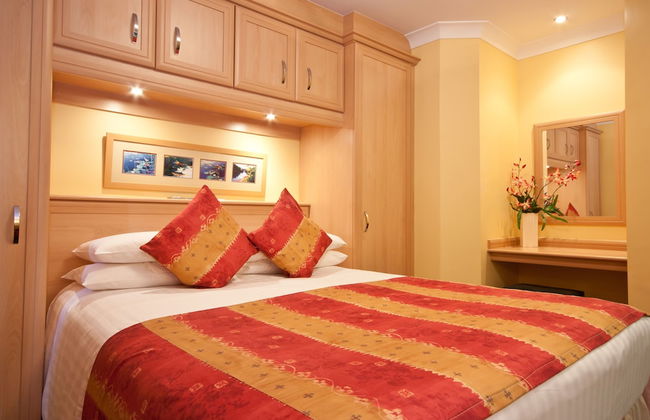
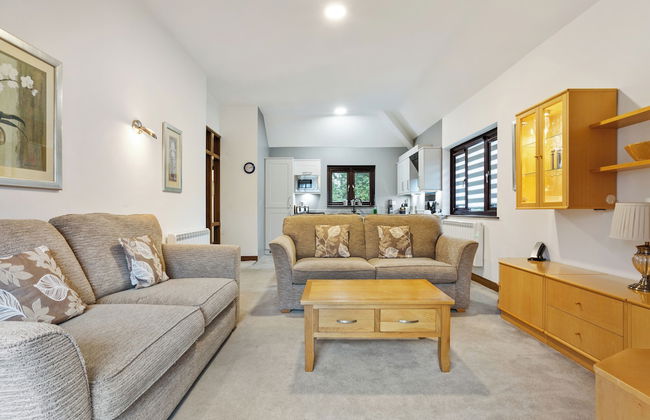
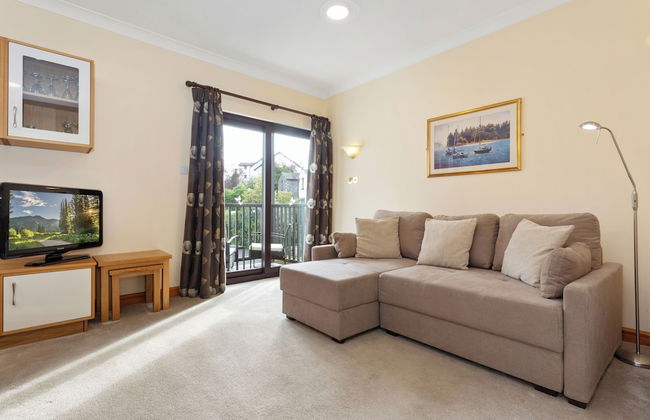
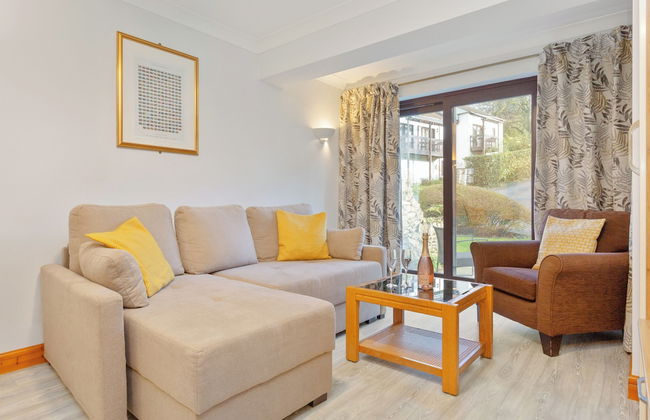
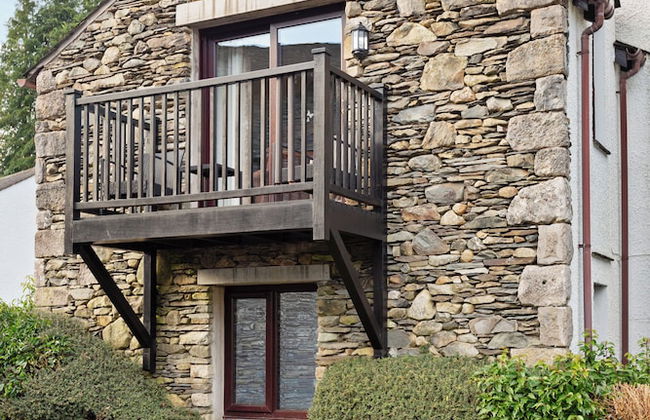
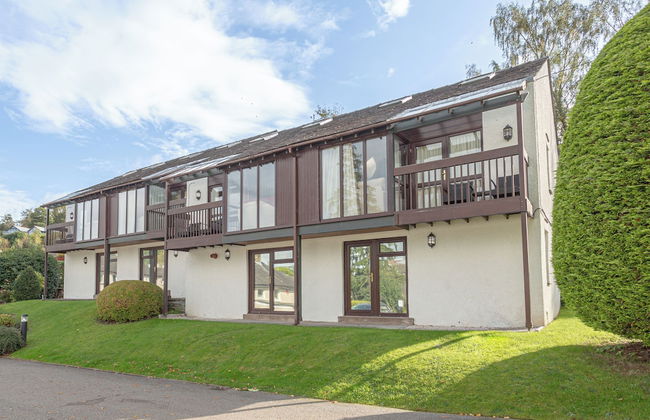
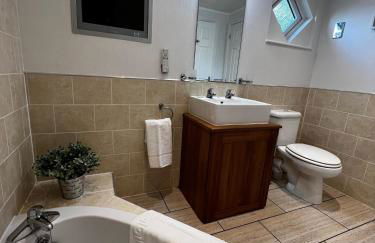
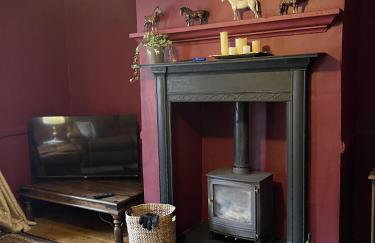
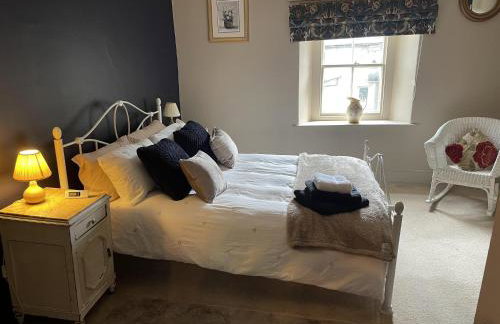
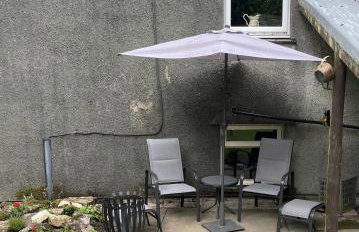
Lindeth Fell Country House - Foto 4
Lindeth Fell Country House - Foto 5
Lindeth Fell Country House - Foto 6
Lindeth Fell Country House - Foto 7
Lindeth Fell Country House - Foto 8
Lindeth Fell Country House - Foto 9
Lindeth Fell Country House - Foto 10
Lindeth Fell Country House - Foto 11
Lindeth Fell Country House - Foto 12
Lindeth Fell Country House - Foto 13
Lindeth Fell Country House - Foto 14
Lindeth Fell Country House - Foto 15
Lindeth Fell Country House - Foto 16
Lindeth Fell Country House - Foto 17
Lindeth Fell Country House - Foto 18
Lindeth Fell Country House - Foto 19
Lindeth Fell Country House - Foto 20
Lindeth Fell Country House - Foto 21
Lindeth Fell Country House - Foto 22
Lindeth Fell Country House - Foto 23
Lindeth Fell Country House - Foto 24
Lindeth Fell Country House - Foto 25
Lindeth Fell Country House - Foto 26
Lindeth Fell Country House - Foto 27
Lindeth Fell Country House - Foto 28
Lindeth Fell Country House - Foto 29
Lindeth Fell Country House - Foto 30
Lindeth Fell Country House - Foto 31
Lindeth Fell Country House - Foto 32
Lindeth Fell Country House - Foto 33
Lindeth Fell Country House - Foto 34
Lindeth Fell Country House - Foto 35
Lindeth Fell Country House - Foto 36
Lindeth Fell Country House - Foto 37
Lindeth Fell Country House - Foto 38
Lindeth Fell Country House - Foto 39
Lindeth Fell Country House - Foto 40
Lindeth Fell Country House - Foto 41
Lindeth Fell Country House - Foto 42
Lindeth Fell Country House - Foto 43
Lindeth Fell Country House - Foto 44
Lindeth Fell Country House - Foto 45
Lindeth Fell Country House - Foto 46
Lindeth Fell Country House - Foto 47
Lindeth Fell Country House - Foto 48
Lindeth Fell Country House - Foto 49
Lindeth Fell Country House - Foto 50
Lindeth Fell Country House - Foto 51
Lindeth Fell Country House - Foto 52
Lindeth Fell Country House - Foto 53
Lindeth Fell Country House - Foto 54
Lindeth Fell Country House - Foto 55
Lindeth Fell Country House - Foto 56
Lindeth Fell Country House - Foto 57
Lindeth Fell Country House - Foto 58
Lindeth Fell Country House - Foto 59
Lindeth Fell Country House - Foto 60
Lindeth Fell Country House - Foto 61
Lindeth Fell Country House - Foto 62
Lindeth Fell Country House - Foto 63
Lindeth Fell Country House - Foto 64
Lindeth Fell Country House - Foto 65
Lindeth Fell Country House - Foto 66
Lindeth Fell Country House - Foto 67
Lindeth Fell Country House - Foto 68
Lindeth Fell Country House - Foto 69
Lindeth Fell Country House - Foto 70
Lindeth Fell Country House - Foto 71
Lindeth Fell Country House - Foto 72
Lindeth Fell Country House - Foto 73
Lindeth Fell Country House - Foto 74
Lindeth Fell Country House - Foto 75
Lindeth Fell Country House - Foto 76
Lindeth Fell Country House - Foto 77
Lindeth Fell Country House - Foto 78

Lindeth Fell Country House

Windermere - Storrs

  • 8 M2
  • 2 Personen
  • Heizung
  • Terrasse
  • Parkplatz
  • Garten
  • Tv
  • Handtücher
  • Bettlaken
9.8Außergewöhnlich | 95 Bewertungen
Cosy Nook Cottage - Foto 1
Cosy Nook Cottage - Foto 2
Cosy Nook Cottage - Foto 3
Cosy Nook Cottage - Foto 4
Cosy Nook Cottage - Foto 5
Cosy Nook Cottage - Foto 6
Cosy Nook Cottage - Foto 7
Cosy Nook Cottage - Foto 8
Cosy Nook Cottage - Foto 9
Cosy Nook Cottage - Foto 10
Cosy Nook Cottage - Foto 11
Cosy Nook Cottage - Foto 12
Cosy Nook Cottage - Foto 13
Cosy Nook Cottage - Foto 14
Cosy Nook Cottage - Foto 15
Cosy Nook Cottage - Foto 16
Cosy Nook Cottage - Foto 17
Cosy Nook Cottage - Foto 18
Cosy Nook Cottage - Foto 19
Cosy Nook Cottage - Foto 20
Cosy Nook Cottage - Foto 21
Cosy Nook Cottage - Foto 22
Cosy Nook Cottage - Foto 23
Cosy Nook Cottage - Foto 24
Cosy Nook Cottage - Foto 25
Cosy Nook Cottage - Foto 26
Cosy Nook Cottage - Foto 27
Cosy Nook Cottage - Foto 28
Cosy Nook Cottage - Foto 29
Cosy Nook Cottage - Foto 30
Cosy Nook Cottage - Foto 31
Cosy Nook Cottage - Foto 32
Cosy Nook Cottage - Foto 33
Cosy Nook Cottage - Foto 34
Cosy Nook Cottage - Foto 35
Cosy Nook Cottage - Foto 36
Cosy Nook Cottage - Foto 37
Cosy Nook Cottage - Foto 38
Cosy Nook Cottage - Foto 39
Cosy Nook Cottage - Foto 40
Cosy Nook Cottage - Foto 41
Cosy Nook Cottage - Foto 42
Cosy Nook Cottage - Foto 43
Cosy Nook Cottage - Foto 44
Cosy Nook Cottage - Foto 45
Cosy Nook Cottage - Foto 46
Cosy Nook Cottage - Foto 47
Cosy Nook Cottage - Foto 48
Cosy Nook Cottage - Foto 49
Cosy Nook Cottage - Foto 50
Cosy Nook Cottage - Foto 51
Cosy Nook Cottage - Foto 52
Cosy Nook Cottage - Foto 53
Cosy Nook Cottage - Foto 54
Cosy Nook Cottage - Foto 55
Cosy Nook Cottage - Foto 56
Cosy Nook Cottage - Foto 57
Cosy Nook Cottage - Foto 58
Cosy Nook Cottage - Foto 59
Cosy Nook Cottage - Foto 60
Cosy Nook Cottage - Foto 61
Cosy Nook Cottage - Foto 62
Cosy Nook Cottage - Foto 63
Cosy Nook Cottage - Foto 64
Cosy Nook Cottage - Foto 65
Cosy Nook Cottage - Foto 66
Cosy Nook Cottage - Foto 67
Cosy Nook Cottage - Foto 68

Cosy Nook Cottage

Appleby in Westmorland - Warcop

  • 36 M2
  • 4 Personen
  • Heizung
  • Parkplatz
  • Garten
  • Tv
  • Waschmaschine
  • Schornstein
  • Handtücher
  • Bettlaken
10Hervorragend | 13 Bewertungen
The Halston Carlisle - Foto 1
The Halston Carlisle - Foto 2
The Halston Carlisle - Foto 3
The Halston Carlisle - Foto 4
The Halston Carlisle - Foto 5
The Halston Carlisle - Foto 6
The Halston Carlisle - Foto 7
The Halston Carlisle - Foto 8
The Halston Carlisle - Foto 9
The Halston Carlisle - Foto 10
The Halston Carlisle - Foto 11
The Halston Carlisle - Foto 12
The Halston Carlisle - Foto 13
The Halston Carlisle - Foto 14
The Halston Carlisle - Foto 15
The Halston Carlisle - Foto 16
The Halston Carlisle - Foto 17
The Halston Carlisle - Foto 18
The Halston Carlisle - Foto 19
The Halston Carlisle - Foto 20
The Halston Carlisle - Foto 21
The Halston Carlisle - Foto 22
The Halston Carlisle - Foto 23
The Halston Carlisle - Foto 24
The Halston Carlisle - Foto 25
The Halston Carlisle - Foto 26
The Halston Carlisle - Foto 27
The Halston Carlisle - Foto 28
The Halston Carlisle - Foto 29
The Halston Carlisle - Foto 30
The Halston Carlisle - Foto 31
The Halston Carlisle - Foto 32
The Halston Carlisle - Foto 33
The Halston Carlisle - Foto 34
The Halston Carlisle - Foto 35
The Halston Carlisle - Foto 36
The Halston Carlisle - Foto 37
The Halston Carlisle - Foto 38
The Halston Carlisle - Foto 39
The Halston Carlisle - Foto 40
The Halston Carlisle - Foto 41
The Halston Carlisle - Foto 42
The Halston Carlisle - Foto 43
The Halston Carlisle - Foto 44
The Halston Carlisle - Foto 45
The Halston Carlisle - Foto 46
The Halston Carlisle - Foto 47
The Halston Carlisle - Foto 48
The Halston Carlisle - Foto 49
The Halston Carlisle - Foto 50
The Halston Carlisle - Foto 51
The Halston Carlisle - Foto 52
The Halston Carlisle - Foto 53
The Halston Carlisle - Foto 54
The Halston Carlisle - Foto 55
The Halston Carlisle - Foto 56
The Halston Carlisle - Foto 57
The Halston Carlisle - Foto 58
The Halston Carlisle - Foto 59
The Halston Carlisle - Foto 60
The Halston Carlisle - Foto 61
The Halston Carlisle - Foto 62
The Halston Carlisle - Foto 63
The Halston Carlisle - Foto 64
The Halston Carlisle - Foto 65
The Halston Carlisle - Foto 66
The Halston Carlisle - Foto 67
The Halston Carlisle - Foto 68
The Halston Carlisle - Foto 69
The Halston Carlisle - Foto 70
The Halston Carlisle - Foto 71
The Halston Carlisle - Foto 72
The Halston Carlisle - Foto 73
The Halston Carlisle - Foto 74
The Halston Carlisle - Foto 75
The Halston Carlisle - Foto 76
The Halston Carlisle - Foto 77
The Halston Carlisle - Foto 78
The Halston Carlisle - Foto 79
The Halston Carlisle - Foto 80
The Halston Carlisle - Foto 81
The Halston Carlisle - Foto 82
The Halston Carlisle - Foto 83
The Halston Carlisle - Foto 84
The Halston Carlisle - Foto 85
The Halston Carlisle - Foto 86
The Halston Carlisle - Foto 87
The Halston Carlisle - Foto 88
The Halston Carlisle - Foto 89
The Halston Carlisle - Foto 90
The Halston Carlisle - Foto 91
The Halston Carlisle - Foto 92
The Halston Carlisle - Foto 93
The Halston Carlisle - Foto 94
The Halston Carlisle - Foto 95
The Halston Carlisle - Foto 96
The Halston Carlisle - Foto 97
The Halston Carlisle - Foto 98
The Halston Carlisle - Foto 99
The Halston Carlisle - Foto 100
The Halston Carlisle - Foto 101
The Halston Carlisle - Foto 102
The Halston Carlisle - Foto 103
The Halston Carlisle - Foto 104
The Halston Carlisle - Foto 105
The Halston Carlisle - Foto 106
The Halston Carlisle - Foto 107
The Halston Carlisle - Foto 108
The Halston Carlisle - Foto 109
The Halston Carlisle - Foto 110
The Halston Carlisle - Foto 111
The Halston Carlisle - Foto 112
The Halston Carlisle - Foto 113
The Halston Carlisle - Foto 114
The Halston Carlisle - Foto 115
The Halston Carlisle - Foto 116
The Halston Carlisle - Foto 117
The Halston Carlisle - Foto 118
The Halston Carlisle - Foto 119
The Halston Carlisle - Foto 120
The Halston Carlisle - Foto 121
The Halston Carlisle - Foto 122
The Halston Carlisle - Foto 123
The Halston Carlisle - Foto 124
The Halston Carlisle - Foto 125
The Halston Carlisle - Foto 126
The Halston Carlisle - Foto 127
The Halston Carlisle - Foto 128
The Halston Carlisle - Foto 129
The Halston Carlisle - Foto 130
The Halston Carlisle - Foto 131
The Halston Carlisle - Foto 132
The Halston Carlisle - Foto 133
The Halston Carlisle - Foto 134
The Halston Carlisle - Foto 135
The Halston Carlisle - Foto 136
The Halston Carlisle - Foto 137
The Halston Carlisle - Foto 138
The Halston Carlisle - Foto 139

The Halston Carlisle

Carlisle - Carlisle - Im Zentrum

  • 64 M2
  • 2 Schlafzimmer
  • 4 Personen
  • Kochnische
  • Heizung
  • Parkplatz
  • Fahrstuhl
  • Garten
  • Tv
  • Handtücher
  • Bettlaken
9.6Außergewöhnlich | 317 Bewertungen
Windermere Hillthwaite Hotel - Foto 1
Windermere Hillthwaite Hotel - Foto 2
Windermere Hillthwaite Hotel - Foto 3
Windermere Hillthwaite Hotel - Foto 4
Windermere Hillthwaite Hotel - Foto 5
Windermere Hillthwaite Hotel - Foto 6
Windermere Hillthwaite Hotel - Foto 7
Windermere Hillthwaite Hotel - Foto 8
Windermere Hillthwaite Hotel - Foto 9
Windermere Hillthwaite Hotel - Foto 10
Windermere Hillthwaite Hotel - Foto 11
Windermere Hillthwaite Hotel - Foto 12
Windermere Hillthwaite Hotel - Foto 13
Windermere Hillthwaite Hotel - Foto 14
Windermere Hillthwaite Hotel - Foto 15
Windermere Hillthwaite Hotel - Foto 16
Windermere Hillthwaite Hotel - Foto 17
Windermere Hillthwaite Hotel - Foto 18
Windermere Hillthwaite Hotel - Foto 19
Windermere Hillthwaite Hotel - Foto 20
Windermere Hillthwaite Hotel - Foto 21
Windermere Hillthwaite Hotel - Foto 22
Windermere Hillthwaite Hotel - Foto 23
Windermere Hillthwaite Hotel - Foto 24
Windermere Hillthwaite Hotel - Foto 25
Windermere Hillthwaite Hotel - Foto 26
Windermere Hillthwaite Hotel - Foto 27
Windermere Hillthwaite Hotel - Foto 28
Windermere Hillthwaite Hotel - Foto 29
Windermere Hillthwaite Hotel - Foto 30
Windermere Hillthwaite Hotel - Foto 31
Windermere Hillthwaite Hotel - Foto 32
Windermere Hillthwaite Hotel - Foto 33
Windermere Hillthwaite Hotel - Foto 34
Windermere Hillthwaite Hotel - Foto 35
Windermere Hillthwaite Hotel - Foto 36
Windermere Hillthwaite Hotel - Foto 37
Windermere Hillthwaite Hotel - Foto 38
Windermere Hillthwaite Hotel - Foto 39
Windermere Hillthwaite Hotel - Foto 40
Windermere Hillthwaite Hotel - Foto 41
Windermere Hillthwaite Hotel - Foto 42
Windermere Hillthwaite Hotel - Foto 43
Windermere Hillthwaite Hotel - Foto 44
Windermere Hillthwaite Hotel - Foto 45
Windermere Hillthwaite Hotel - Foto 46
Windermere Hillthwaite Hotel - Foto 47
Windermere Hillthwaite Hotel - Foto 48
Windermere Hillthwaite Hotel - Foto 49
Windermere Hillthwaite Hotel - Foto 50
Windermere Hillthwaite Hotel - Foto 51
Windermere Hillthwaite Hotel - Foto 52
Windermere Hillthwaite Hotel - Foto 53
Windermere Hillthwaite Hotel - Foto 54
Windermere Hillthwaite Hotel - Foto 55
Windermere Hillthwaite Hotel - Foto 56
Windermere Hillthwaite Hotel - Foto 57
Windermere Hillthwaite Hotel - Foto 58
Windermere Hillthwaite Hotel - Foto 59
Windermere Hillthwaite Hotel - Foto 60
Windermere Hillthwaite Hotel - Foto 61
Windermere Hillthwaite Hotel - Foto 62
Windermere Hillthwaite Hotel - Foto 63
Windermere Hillthwaite Hotel - Foto 64
Windermere Hillthwaite Hotel - Foto 65
Windermere Hillthwaite Hotel - Foto 66
Windermere Hillthwaite Hotel - Foto 67
Windermere Hillthwaite Hotel - Foto 68
Windermere Hillthwaite Hotel - Foto 69
Windermere Hillthwaite Hotel - Foto 70
Windermere Hillthwaite Hotel - Foto 71
Windermere Hillthwaite Hotel - Foto 72
Windermere Hillthwaite Hotel - Foto 73
Windermere Hillthwaite Hotel - Foto 74
Windermere Hillthwaite Hotel - Foto 75
Windermere Hillthwaite Hotel - Foto 76
Windermere Hillthwaite Hotel - Foto 77
Windermere Hillthwaite Hotel - Foto 78
Windermere Hillthwaite Hotel - Foto 79
Windermere Hillthwaite Hotel - Foto 80

Windermere Hillthwaite Hotel

Windermere - Windermere

  • 12 M2
  • 2 Personen
  • Heizung
  • Terrasse
  • Schwimmbad
  • Parkplatz
  • Garten
  • Tv
  • Handtücher
  • Bettlaken
9.2Außergewöhnlich | 385 Bewertungen
The Old Wool House Apartments - Foto 1
The Old Wool House Apartments - Foto 2
The Old Wool House Apartments - Foto 3
The Old Wool House Apartments - Foto 4
The Old Wool House Apartments - Foto 5
The Old Wool House Apartments - Foto 6
The Old Wool House Apartments - Foto 7
The Old Wool House Apartments - Foto 8
The Old Wool House Apartments - Foto 9
The Old Wool House Apartments - Foto 10
The Old Wool House Apartments - Foto 11
The Old Wool House Apartments - Foto 12
The Old Wool House Apartments - Foto 13
The Old Wool House Apartments - Foto 14
The Old Wool House Apartments - Foto 15
The Old Wool House Apartments - Foto 16
The Old Wool House Apartments - Foto 17
The Old Wool House Apartments - Foto 18
The Old Wool House Apartments - Foto 19
The Old Wool House Apartments - Foto 20
The Old Wool House Apartments - Foto 21
The Old Wool House Apartments - Foto 22
The Old Wool House Apartments - Foto 23
The Old Wool House Apartments - Foto 24
The Old Wool House Apartments - Foto 25
The Old Wool House Apartments - Foto 26
The Old Wool House Apartments - Foto 27
The Old Wool House Apartments - Foto 28
The Old Wool House Apartments - Foto 29
The Old Wool House Apartments - Foto 30
The Old Wool House Apartments - Foto 31
The Old Wool House Apartments - Foto 32
The Old Wool House Apartments - Foto 33
The Old Wool House Apartments - Foto 34
The Old Wool House Apartments - Foto 35
The Old Wool House Apartments - Foto 36
The Old Wool House Apartments - Foto 37
The Old Wool House Apartments - Foto 38
The Old Wool House Apartments - Foto 39
The Old Wool House Apartments - Foto 40
The Old Wool House Apartments - Foto 41
The Old Wool House Apartments - Foto 42
The Old Wool House Apartments - Foto 43
The Old Wool House Apartments - Foto 44
The Old Wool House Apartments - Foto 45
The Old Wool House Apartments - Foto 46
The Old Wool House Apartments - Foto 47
The Old Wool House Apartments - Foto 48
The Old Wool House Apartments - Foto 49
The Old Wool House Apartments - Foto 50
The Old Wool House Apartments - Foto 51

The Old Wool House Apartments

Carlisle - Carlisle - Im Zentrum

  • 51 M2
  • 1 Schlafzimmer
  • 4 Personen
  • Kochnische
  • Heizung
  • Parkplatz
  • Tv
  • Handtücher
  • Bettlaken
9.8Außergewöhnlich | 64 Bewertungen
Lonsdale House Boutique Apartments - Foto 1
Lonsdale House Boutique Apartments - Foto 2
Lonsdale House Boutique Apartments - Foto 3
Lonsdale House Boutique Apartments - Foto 4
Lonsdale House Boutique Apartments - Foto 5
Lonsdale House Boutique Apartments - Foto 6
Lonsdale House Boutique Apartments - Foto 7
Lonsdale House Boutique Apartments - Foto 8
Lonsdale House Boutique Apartments - Foto 9
Lonsdale House Boutique Apartments - Foto 10
Lonsdale House Boutique Apartments - Foto 11
Lonsdale House Boutique Apartments - Foto 12
Lonsdale House Boutique Apartments - Foto 13
Lonsdale House Boutique Apartments - Foto 14
Lonsdale House Boutique Apartments - Foto 15
Lonsdale House Boutique Apartments - Foto 16
Lonsdale House Boutique Apartments - Foto 17
Lonsdale House Boutique Apartments - Foto 18
Lonsdale House Boutique Apartments - Foto 19
Lonsdale House Boutique Apartments - Foto 20
Lonsdale House Boutique Apartments - Foto 21
Lonsdale House Boutique Apartments - Foto 22
Lonsdale House Boutique Apartments - Foto 23
Lonsdale House Boutique Apartments - Foto 24
Lonsdale House Boutique Apartments - Foto 25
Lonsdale House Boutique Apartments - Foto 26
Lonsdale House Boutique Apartments - Foto 27
Lonsdale House Boutique Apartments - Foto 28
Lonsdale House Boutique Apartments - Foto 29
Lonsdale House Boutique Apartments - Foto 30
Lonsdale House Boutique Apartments - Foto 31
Lonsdale House Boutique Apartments - Foto 32
Lonsdale House Boutique Apartments - Foto 33
Lonsdale House Boutique Apartments - Foto 34
Lonsdale House Boutique Apartments - Foto 35
Lonsdale House Boutique Apartments - Foto 36
Lonsdale House Boutique Apartments - Foto 37
Lonsdale House Boutique Apartments - Foto 38
Lonsdale House Boutique Apartments - Foto 39
Lonsdale House Boutique Apartments - Foto 40
Lonsdale House Boutique Apartments - Foto 41
Lonsdale House Boutique Apartments - Foto 42
Lonsdale House Boutique Apartments - Foto 43
Lonsdale House Boutique Apartments - Foto 44
Lonsdale House Boutique Apartments - Foto 45
Lonsdale House Boutique Apartments - Foto 46
Lonsdale House Boutique Apartments - Foto 47
Lonsdale House Boutique Apartments - Foto 48
Lonsdale House Boutique Apartments - Foto 49
Lonsdale House Boutique Apartments - Foto 50
Lonsdale House Boutique Apartments - Foto 51
Lonsdale House Boutique Apartments - Foto 52
Lonsdale House Boutique Apartments - Foto 53
Lonsdale House Boutique Apartments - Foto 54
Lonsdale House Boutique Apartments - Foto 55
Lonsdale House Boutique Apartments - Foto 56
Lonsdale House Boutique Apartments - Foto 57
Lonsdale House Boutique Apartments - Foto 58
Lonsdale House Boutique Apartments - Foto 59
Lonsdale House Boutique Apartments - Foto 60
Lonsdale House Boutique Apartments - Foto 61
Lonsdale House Boutique Apartments - Foto 62
Lonsdale House Boutique Apartments - Foto 63
Lonsdale House Boutique Apartments - Foto 64
Lonsdale House Boutique Apartments - Foto 65
Lonsdale House Boutique Apartments - Foto 66
Lonsdale House Boutique Apartments - Foto 67
Lonsdale House Boutique Apartments - Foto 68
Lonsdale House Boutique Apartments - Foto 69
Lonsdale House Boutique Apartments - Foto 70
Lonsdale House Boutique Apartments - Foto 71
Lonsdale House Boutique Apartments - Foto 72
Lonsdale House Boutique Apartments - Foto 73
Lonsdale House Boutique Apartments - Foto 74
Lonsdale House Boutique Apartments - Foto 75
Lonsdale House Boutique Apartments - Foto 76
Lonsdale House Boutique Apartments - Foto 77
Lonsdale House Boutique Apartments - Foto 78
Lonsdale House Boutique Apartments - Foto 79
Lonsdale House Boutique Apartments - Foto 80
Lonsdale House Boutique Apartments - Foto 81
Lonsdale House Boutique Apartments - Foto 82
Lonsdale House Boutique Apartments - Foto 83
Lonsdale House Boutique Apartments - Foto 84
Lonsdale House Boutique Apartments - Foto 85
Lonsdale House Boutique Apartments - Foto 86
Lonsdale House Boutique Apartments - Foto 87
Lonsdale House Boutique Apartments - Foto 88
Lonsdale House Boutique Apartments - Foto 89
Lonsdale House Boutique Apartments - Foto 90
Lonsdale House Boutique Apartments - Foto 91
Lonsdale House Boutique Apartments - Foto 92
Lonsdale House Boutique Apartments - Foto 93
Lonsdale House Boutique Apartments - Foto 94
Lonsdale House Boutique Apartments - Foto 95
Lonsdale House Boutique Apartments - Foto 96
Lonsdale House Boutique Apartments - Foto 97
Lonsdale House Boutique Apartments - Foto 98
Lonsdale House Boutique Apartments - Foto 99
Lonsdale House Boutique Apartments - Foto 100
Lonsdale House Boutique Apartments - Foto 101
Lonsdale House Boutique Apartments - Foto 102
Lonsdale House Boutique Apartments - Foto 103
Lonsdale House Boutique Apartments - Foto 104
Lonsdale House Boutique Apartments - Foto 105
Lonsdale House Boutique Apartments - Foto 106
Lonsdale House Boutique Apartments - Foto 107
Lonsdale House Boutique Apartments - Foto 108
Lonsdale House Boutique Apartments - Foto 109
Lonsdale House Boutique Apartments - Foto 110
Lonsdale House Boutique Apartments - Foto 111
Lonsdale House Boutique Apartments - Foto 112
Lonsdale House Boutique Apartments - Foto 113
Lonsdale House Boutique Apartments - Foto 114
Lonsdale House Boutique Apartments - Foto 115
Lonsdale House Boutique Apartments - Foto 116
Lonsdale House Boutique Apartments - Foto 117
Lonsdale House Boutique Apartments - Foto 118
Lonsdale House Boutique Apartments - Foto 119
Lonsdale House Boutique Apartments - Foto 120
Lonsdale House Boutique Apartments - Foto 121
Lonsdale House Boutique Apartments - Foto 122
Lonsdale House Boutique Apartments - Foto 123
Lonsdale House Boutique Apartments - Foto 124
Lonsdale House Boutique Apartments - Foto 125
Lonsdale House Boutique Apartments - Foto 126
Lonsdale House Boutique Apartments - Foto 127
Lonsdale House Boutique Apartments - Foto 128
Lonsdale House Boutique Apartments - Foto 129
Lonsdale House Boutique Apartments - Foto 130
Lonsdale House Boutique Apartments - Foto 131
Lonsdale House Boutique Apartments - Foto 132
Lonsdale House Boutique Apartments - Foto 133
Lonsdale House Boutique Apartments - Foto 134
Lonsdale House Boutique Apartments - Foto 135
Lonsdale House Boutique Apartments - Foto 136
Lonsdale House Boutique Apartments - Foto 137
Lonsdale House Boutique Apartments - Foto 138
Lonsdale House Boutique Apartments - Foto 139
Lonsdale House Boutique Apartments - Foto 140
Lonsdale House Boutique Apartments - Foto 141
Lonsdale House Boutique Apartments - Foto 142
Lonsdale House Boutique Apartments - Foto 143
Lonsdale House Boutique Apartments - Foto 144
Lonsdale House Boutique Apartments - Foto 145
Lonsdale House Boutique Apartments - Foto 146
Lonsdale House Boutique Apartments - Foto 147
Lonsdale House Boutique Apartments - Foto 148
Lonsdale House Boutique Apartments - Foto 149
Lonsdale House Boutique Apartments - Foto 150
Lonsdale House Boutique Apartments - Foto 151
Lonsdale House Boutique Apartments - Foto 152
Lonsdale House Boutique Apartments - Foto 153
Lonsdale House Boutique Apartments - Foto 154
Lonsdale House Boutique Apartments - Foto 155
Lonsdale House Boutique Apartments - Foto 156
Lonsdale House Boutique Apartments - Foto 157
Lonsdale House Boutique Apartments - Foto 158

Lonsdale House Boutique Apartments

Ulverston - Outcast

  • 48 M2
  • 1 Schlafzimmer
  • 3 Personen
  • Kochnische
  • Heizung
  • Terrasse
  • Parkplatz
  • Garten
  • Tv
  • Handtücher
  • Bettlaken
9.4Außergewöhnlich | 33 Bewertungen
Roundthorn Country House and Luxury Apartments - Foto 1
Roundthorn Country House and Luxury Apartments - Foto 2
Roundthorn Country House and Luxury Apartments - Foto 3
Roundthorn Country House and Luxury Apartments - Foto 4
Roundthorn Country House and Luxury Apartments - Foto 5
Roundthorn Country House and Luxury Apartments - Foto 6
Roundthorn Country House and Luxury Apartments - Foto 7
Roundthorn Country House and Luxury Apartments - Foto 8
Roundthorn Country House and Luxury Apartments - Foto 9
Roundthorn Country House and Luxury Apartments - Foto 10
Roundthorn Country House and Luxury Apartments - Foto 11
Roundthorn Country House and Luxury Apartments - Foto 12
Roundthorn Country House and Luxury Apartments - Foto 13
Roundthorn Country House and Luxury Apartments - Foto 14
Roundthorn Country House and Luxury Apartments - Foto 15
Roundthorn Country House and Luxury Apartments - Foto 16
Roundthorn Country House and Luxury Apartments - Foto 17
Roundthorn Country House and Luxury Apartments - Foto 18
Roundthorn Country House and Luxury Apartments - Foto 19
Roundthorn Country House and Luxury Apartments - Foto 20
Roundthorn Country House and Luxury Apartments - Foto 21
Roundthorn Country House and Luxury Apartments - Foto 22
Roundthorn Country House and Luxury Apartments - Foto 23
Roundthorn Country House and Luxury Apartments - Foto 24
Roundthorn Country House and Luxury Apartments - Foto 25
Roundthorn Country House and Luxury Apartments - Foto 26
Roundthorn Country House and Luxury Apartments - Foto 27
Roundthorn Country House and Luxury Apartments - Foto 28
Roundthorn Country House and Luxury Apartments - Foto 29
Roundthorn Country House and Luxury Apartments - Foto 30
Roundthorn Country House and Luxury Apartments - Foto 31
Roundthorn Country House and Luxury Apartments - Foto 32
Roundthorn Country House and Luxury Apartments - Foto 33
Roundthorn Country House and Luxury Apartments - Foto 34
Roundthorn Country House and Luxury Apartments - Foto 35
Roundthorn Country House and Luxury Apartments - Foto 36
Roundthorn Country House and Luxury Apartments - Foto 37
Roundthorn Country House and Luxury Apartments - Foto 38
Roundthorn Country House and Luxury Apartments - Foto 39
Roundthorn Country House and Luxury Apartments - Foto 40
Roundthorn Country House and Luxury Apartments - Foto 41
Roundthorn Country House and Luxury Apartments - Foto 42

Roundthorn Country House and Luxury Apartments

Penrith - Roundthorn

  • 66 M2
  • 4 Personen
  • Heizung
  • Garten
  • Tv
  • Handtücher
  • Bettlaken
9.6Außergewöhnlich | 267 Bewertungen
Hawkshead Suites - Foto 1
Hawkshead Suites - Foto 2
Hawkshead Suites - Foto 3
Hawkshead Suites - Foto 4
Hawkshead Suites - Foto 5
Hawkshead Suites - Foto 6
Hawkshead Suites - Foto 7
Hawkshead Suites - Foto 8
Hawkshead Suites - Foto 9
Hawkshead Suites - Foto 10
Hawkshead Suites - Foto 11
Hawkshead Suites - Foto 12
Hawkshead Suites - Foto 13
Hawkshead Suites - Foto 14
Hawkshead Suites - Foto 15
Hawkshead Suites - Foto 16
Hawkshead Suites - Foto 17
Hawkshead Suites - Foto 18
Hawkshead Suites - Foto 19
Hawkshead Suites - Foto 20
Hawkshead Suites - Foto 21
Hawkshead Suites - Foto 22
Hawkshead Suites - Foto 23
Hawkshead Suites - Foto 24
Hawkshead Suites - Foto 25
Hawkshead Suites - Foto 26
Hawkshead Suites - Foto 27
Hawkshead Suites - Foto 28
Hawkshead Suites - Foto 29
Hawkshead Suites - Foto 30
Hawkshead Suites - Foto 31
Hawkshead Suites - Foto 32
Hawkshead Suites - Foto 33
Hawkshead Suites - Foto 34

Hawkshead Suites

Ambleside - Hawkshead

  • 60 M2
  • 1 Schlafzimmer
  • 2 Personen
  • Klimaanlage
  • Heizung
  • Terrasse
  • Parkplatz
  • Garten
9.9Außergewöhnlich | 70 Bewertungen
Hapimag Burnside Park Apartments - Foto 1
Hapimag Burnside Park Apartments - Foto 2
Hapimag Burnside Park Apartments - Foto 3
Hapimag Burnside Park Apartments - Foto 4
Hapimag Burnside Park Apartments - Foto 5
Hapimag Burnside Park Apartments - Foto 6
Hapimag Burnside Park Apartments - Foto 7
Hapimag Burnside Park Apartments - Foto 8
Hapimag Burnside Park Apartments - Foto 9
Hapimag Burnside Park Apartments - Foto 10
Hapimag Burnside Park Apartments - Foto 11
Hapimag Burnside Park Apartments - Foto 12
Hapimag Burnside Park Apartments - Foto 13
Hapimag Burnside Park Apartments - Foto 14
Hapimag Burnside Park Apartments - Foto 15
Hapimag Burnside Park Apartments - Foto 16
Hapimag Burnside Park Apartments - Foto 17
Hapimag Burnside Park Apartments - Foto 18
Hapimag Burnside Park Apartments - Foto 19
Hapimag Burnside Park Apartments - Foto 20
Hapimag Burnside Park Apartments - Foto 21
Hapimag Burnside Park Apartments - Foto 22
Hapimag Burnside Park Apartments - Foto 23
Hapimag Burnside Park Apartments - Foto 24
Hapimag Burnside Park Apartments - Foto 25
Hapimag Burnside Park Apartments - Foto 26
Hapimag Burnside Park Apartments - Foto 27
Hapimag Burnside Park Apartments - Foto 28
Hapimag Burnside Park Apartments - Foto 29
Hapimag Burnside Park Apartments - Foto 30
Hapimag Burnside Park Apartments - Foto 31
Hapimag Burnside Park Apartments - Foto 32
Hapimag Burnside Park Apartments - Foto 33
Hapimag Burnside Park Apartments - Foto 34
Hapimag Burnside Park Apartments - Foto 35
Hapimag Burnside Park Apartments - Foto 36
Hapimag Burnside Park Apartments - Foto 37
Hapimag Burnside Park Apartments - Foto 38
Hapimag Burnside Park Apartments - Foto 39
Hapimag Burnside Park Apartments - Foto 40
Hapimag Burnside Park Apartments - Foto 41
Hapimag Burnside Park Apartments - Foto 42
Hapimag Burnside Park Apartments - Foto 43
Hapimag Burnside Park Apartments - Foto 44
Hapimag Burnside Park Apartments - Foto 45
Hapimag Burnside Park Apartments - Foto 46
Hapimag Burnside Park Apartments - Foto 47
Hapimag Burnside Park Apartments - Foto 48
Hapimag Burnside Park Apartments - Foto 49
Hapimag Burnside Park Apartments - Foto 50
Hapimag Burnside Park Apartments - Foto 51
Hapimag Burnside Park Apartments - Foto 52
Hapimag Burnside Park Apartments - Foto 53
Hapimag Burnside Park Apartments - Foto 54
Hapimag Burnside Park Apartments - Foto 55
Hapimag Burnside Park Apartments - Foto 56
Hapimag Burnside Park Apartments - Foto 57
Hapimag Burnside Park Apartments - Foto 58
Hapimag Burnside Park Apartments - Foto 59
Hapimag Burnside Park Apartments - Foto 60
Hapimag Burnside Park Apartments - Foto 61
Hapimag Burnside Park Apartments - Foto 62
Hapimag Burnside Park Apartments - Foto 63
Hapimag Burnside Park Apartments - Foto 64
Hapimag Burnside Park Apartments - Foto 65
Hapimag Burnside Park Apartments - Foto 66
Hapimag Burnside Park Apartments - Foto 67
Hapimag Burnside Park Apartments - Foto 68
Hapimag Burnside Park Apartments - Foto 69
Hapimag Burnside Park Apartments - Foto 70
Hapimag Burnside Park Apartments - Foto 71
Hapimag Burnside Park Apartments - Foto 72

Hapimag Burnside Park Apartments

Windermere - Bowness on Windermere

  • 6 Personen
  • Heizung
  • Terrasse
  • Parkplatz
  • Garten
  • Tv
  • Barbecue
  • Handtücher
  • Bettlaken
9.2Außergewöhnlich | 90 Bewertungen
Pheasant Lodge Scottish Borders - Foto 1
Pheasant Lodge Scottish Borders - Foto 2
Pheasant Lodge Scottish Borders - Foto 3
Pheasant Lodge Scottish Borders - Foto 4
Pheasant Lodge Scottish Borders - Foto 5
Pheasant Lodge Scottish Borders - Foto 6
Pheasant Lodge Scottish Borders - Foto 7
Pheasant Lodge Scottish Borders - Foto 8
Pheasant Lodge Scottish Borders - Foto 9
Pheasant Lodge Scottish Borders - Foto 10
Pheasant Lodge Scottish Borders - Foto 11
Pheasant Lodge Scottish Borders - Foto 12
Pheasant Lodge Scottish Borders - Foto 13
Pheasant Lodge Scottish Borders - Foto 14
Pheasant Lodge Scottish Borders - Foto 15
Pheasant Lodge Scottish Borders - Foto 16
Pheasant Lodge Scottish Borders - Foto 17
Pheasant Lodge Scottish Borders - Foto 18
Pheasant Lodge Scottish Borders - Foto 19
Pheasant Lodge Scottish Borders - Foto 20
Pheasant Lodge Scottish Borders - Foto 21
Pheasant Lodge Scottish Borders - Foto 22
Pheasant Lodge Scottish Borders - Foto 23
Pheasant Lodge Scottish Borders - Foto 24
Pheasant Lodge Scottish Borders - Foto 25
Pheasant Lodge Scottish Borders - Foto 26
Pheasant Lodge Scottish Borders - Foto 27
Pheasant Lodge Scottish Borders - Foto 28
Pheasant Lodge Scottish Borders - Foto 29
Pheasant Lodge Scottish Borders - Foto 30
Pheasant Lodge Scottish Borders - Foto 31
Pheasant Lodge Scottish Borders - Foto 32
Pheasant Lodge Scottish Borders - Foto 33
Pheasant Lodge Scottish Borders - Foto 34
Pheasant Lodge Scottish Borders - Foto 35
Pheasant Lodge Scottish Borders - Foto 36
Pheasant Lodge Scottish Borders - Foto 37
Pheasant Lodge Scottish Borders - Foto 38
Pheasant Lodge Scottish Borders - Foto 39
Pheasant Lodge Scottish Borders - Foto 40
Pheasant Lodge Scottish Borders - Foto 41
Pheasant Lodge Scottish Borders - Foto 42
Pheasant Lodge Scottish Borders - Foto 43
Pheasant Lodge Scottish Borders - Foto 44
Pheasant Lodge Scottish Borders - Foto 45
Pheasant Lodge Scottish Borders - Foto 46
Pheasant Lodge Scottish Borders - Foto 47
Pheasant Lodge Scottish Borders - Foto 48
Pheasant Lodge Scottish Borders - Foto 49
Pheasant Lodge Scottish Borders - Foto 50
Pheasant Lodge Scottish Borders - Foto 51
Pheasant Lodge Scottish Borders - Foto 52
Pheasant Lodge Scottish Borders - Foto 53
Pheasant Lodge Scottish Borders - Foto 54
Pheasant Lodge Scottish Borders - Foto 55
Pheasant Lodge Scottish Borders - Foto 56
Pheasant Lodge Scottish Borders - Foto 57
Pheasant Lodge Scottish Borders - Foto 58
Pheasant Lodge Scottish Borders - Foto 59
Pheasant Lodge Scottish Borders - Foto 60
Pheasant Lodge Scottish Borders - Foto 61
Pheasant Lodge Scottish Borders - Foto 62
Pheasant Lodge Scottish Borders - Foto 63

Pheasant Lodge Scottish Borders

Carlisle - Longtown - 13 km vom Zentrum

  • 1200 M2
  • 1 Schlafzimmer
  • 2 Personen
  • Heizung
  • Terrasse
  • Parkplatz
  • Garten
  • Barbecue
10Hervorragend | 29 Bewertungen
Central Near Hospital 2 Bedroom - Sleeps 4 - Self Check In - Fully Furnished - Foto 1
Central Near Hospital 2 Bedroom - Sleeps 4 - Self Check In - Fully Furnished - Foto 2
Central Near Hospital 2 Bedroom - Sleeps 4 - Self Check In - Fully Furnished - Foto 3
Central Near Hospital 2 Bedroom - Sleeps 4 - Self Check In - Fully Furnished - Foto 4
Central Near Hospital 2 Bedroom - Sleeps 4 - Self Check In - Fully Furnished - Foto 5
Central Near Hospital 2 Bedroom - Sleeps 4 - Self Check In - Fully Furnished - Foto 6
Central Near Hospital 2 Bedroom - Sleeps 4 - Self Check In - Fully Furnished - Foto 7
Central Near Hospital 2 Bedroom - Sleeps 4 - Self Check In - Fully Furnished - Foto 8
Central Near Hospital 2 Bedroom - Sleeps 4 - Self Check In - Fully Furnished - Foto 9
Central Near Hospital 2 Bedroom - Sleeps 4 - Self Check In - Fully Furnished - Foto 10
Central Near Hospital 2 Bedroom - Sleeps 4 - Self Check In - Fully Furnished - Foto 11
Central Near Hospital 2 Bedroom - Sleeps 4 - Self Check In - Fully Furnished - Foto 12
Central Near Hospital 2 Bedroom - Sleeps 4 - Self Check In - Fully Furnished - Foto 13
Central Near Hospital 2 Bedroom - Sleeps 4 - Self Check In - Fully Furnished - Foto 14
Central Near Hospital 2 Bedroom - Sleeps 4 - Self Check In - Fully Furnished - Foto 15
Central Near Hospital 2 Bedroom - Sleeps 4 - Self Check In - Fully Furnished - Foto 16
Central Near Hospital 2 Bedroom - Sleeps 4 - Self Check In - Fully Furnished - Foto 17
Central Near Hospital 2 Bedroom - Sleeps 4 - Self Check In - Fully Furnished - Foto 18
Central Near Hospital 2 Bedroom - Sleeps 4 - Self Check In - Fully Furnished - Foto 19
Central Near Hospital 2 Bedroom - Sleeps 4 - Self Check In - Fully Furnished - Foto 20
Central Near Hospital 2 Bedroom - Sleeps 4 - Self Check In - Fully Furnished - Foto 21
Central Near Hospital 2 Bedroom - Sleeps 4 - Self Check In - Fully Furnished - Foto 22
Central Near Hospital 2 Bedroom - Sleeps 4 - Self Check In - Fully Furnished - Foto 23
Central Near Hospital 2 Bedroom - Sleeps 4 - Self Check In - Fully Furnished - Foto 24
Central Near Hospital 2 Bedroom - Sleeps 4 - Self Check In - Fully Furnished - Foto 25
Central Near Hospital 2 Bedroom - Sleeps 4 - Self Check In - Fully Furnished - Foto 26
Central Near Hospital 2 Bedroom - Sleeps 4 - Self Check In - Fully Furnished - Foto 27
Central Near Hospital 2 Bedroom - Sleeps 4 - Self Check In - Fully Furnished - Foto 28
Central Near Hospital 2 Bedroom - Sleeps 4 - Self Check In - Fully Furnished - Foto 29
Central Near Hospital 2 Bedroom - Sleeps 4 - Self Check In - Fully Furnished - Foto 30
Central Near Hospital 2 Bedroom - Sleeps 4 - Self Check In - Fully Furnished - Foto 31
Central Near Hospital 2 Bedroom - Sleeps 4 - Self Check In - Fully Furnished - Foto 32
Central Near Hospital 2 Bedroom - Sleeps 4 - Self Check In - Fully Furnished - Foto 33
Central Near Hospital 2 Bedroom - Sleeps 4 - Self Check In - Fully Furnished - Foto 34
Central Near Hospital 2 Bedroom - Sleeps 4 - Self Check In - Fully Furnished - Foto 35
Central Near Hospital 2 Bedroom - Sleeps 4 - Self Check In - Fully Furnished - Foto 36
Central Near Hospital 2 Bedroom - Sleeps 4 - Self Check In - Fully Furnished - Foto 37
Central Near Hospital 2 Bedroom - Sleeps 4 - Self Check In - Fully Furnished - Foto 38

Central Near Hospital 2 Bedroom - Sleeps 4 - Self Check In - Fully Furnished

Carlisle - Caldewgate - 360 m vom Zentrum

  • 9 M2
  • 2 Schlafzimmer
  • 4 Personen
  • Heizung
  • Terrasse
  • Parkplatz
10Hervorragend | 10 Bewertungen
Beachside holiday home on RSPB nature reserve - Foto 1
Beachside holiday home on RSPB nature reserve - Foto 2
Beachside holiday home on RSPB nature reserve - Foto 3
Beachside holiday home on RSPB nature reserve - Foto 4
Beachside holiday home on RSPB nature reserve - Foto 5
Beachside holiday home on RSPB nature reserve - Foto 6
Beachside holiday home on RSPB nature reserve - Foto 7
Beachside holiday home on RSPB nature reserve - Foto 8
Beachside holiday home on RSPB nature reserve - Foto 9
Beachside holiday home on RSPB nature reserve - Foto 10
Beachside holiday home on RSPB nature reserve - Foto 11
Beachside holiday home on RSPB nature reserve - Foto 12
Beachside holiday home on RSPB nature reserve - Foto 13
Beachside holiday home on RSPB nature reserve - Foto 14
Beachside holiday home on RSPB nature reserve - Foto 15
Beachside holiday home on RSPB nature reserve - Foto 16
Beachside holiday home on RSPB nature reserve - Foto 17
Beachside holiday home on RSPB nature reserve - Foto 18
Beachside holiday home on RSPB nature reserve - Foto 19
Beachside holiday home on RSPB nature reserve - Foto 20
Beachside holiday home on RSPB nature reserve - Foto 21
Beachside holiday home on RSPB nature reserve - Foto 22
Beachside holiday home on RSPB nature reserve - Foto 23
Beachside holiday home on RSPB nature reserve - Foto 24
Beachside holiday home on RSPB nature reserve - Foto 25
Beachside holiday home on RSPB nature reserve - Foto 26
Beachside holiday home on RSPB nature reserve - Foto 27
Beachside holiday home on RSPB nature reserve - Foto 28
Beachside holiday home on RSPB nature reserve - Foto 29
Beachside holiday home on RSPB nature reserve - Foto 30
Beachside holiday home on RSPB nature reserve - Foto 31
Beachside holiday home on RSPB nature reserve - Foto 32
Beachside holiday home on RSPB nature reserve - Foto 33
Beachside holiday home on RSPB nature reserve - Foto 34
Beachside holiday home on RSPB nature reserve - Foto 35
Beachside holiday home on RSPB nature reserve - Foto 36
Beachside holiday home on RSPB nature reserve - Foto 37
Beachside holiday home on RSPB nature reserve - Foto 38
Beachside holiday home on RSPB nature reserve - Foto 39
Beachside holiday home on RSPB nature reserve - Foto 40
Beachside holiday home on RSPB nature reserve - Foto 41
Beachside holiday home on RSPB nature reserve - Foto 42

Beachside holiday home on RSPB nature reserve

Millom - Haverigg

  • 2 Schlafzimmer
  • 4 Personen
  • Heizung
  • Terrasse
  • Schwimmbad
  • Parkplatz
  • Garten
9.6Außergewöhnlich | 28 Bewertungen
Abbey Apartments - Modern Serviced Apartments - Tourists & Professionals - Foto 1
Abbey Apartments - Modern Serviced Apartments - Tourists & Professionals - Foto 2
Abbey Apartments - Modern Serviced Apartments - Tourists & Professionals - Foto 3
Abbey Apartments - Modern Serviced Apartments - Tourists & Professionals - Foto 4
Abbey Apartments - Modern Serviced Apartments - Tourists & Professionals - Foto 5
Abbey Apartments - Modern Serviced Apartments - Tourists & Professionals - Foto 6
Abbey Apartments - Modern Serviced Apartments - Tourists & Professionals - Foto 7
Abbey Apartments - Modern Serviced Apartments - Tourists & Professionals - Foto 8
Abbey Apartments - Modern Serviced Apartments - Tourists & Professionals - Foto 9
Abbey Apartments - Modern Serviced Apartments - Tourists & Professionals - Foto 10
Abbey Apartments - Modern Serviced Apartments - Tourists & Professionals - Foto 11
Abbey Apartments - Modern Serviced Apartments - Tourists & Professionals - Foto 12
Abbey Apartments - Modern Serviced Apartments - Tourists & Professionals - Foto 13
Abbey Apartments - Modern Serviced Apartments - Tourists & Professionals - Foto 14
Abbey Apartments - Modern Serviced Apartments - Tourists & Professionals - Foto 15
Abbey Apartments - Modern Serviced Apartments - Tourists & Professionals - Foto 16
Abbey Apartments - Modern Serviced Apartments - Tourists & Professionals - Foto 17
Abbey Apartments - Modern Serviced Apartments - Tourists & Professionals - Foto 18
Abbey Apartments - Modern Serviced Apartments - Tourists & Professionals - Foto 19
Abbey Apartments - Modern Serviced Apartments - Tourists & Professionals - Foto 20
Abbey Apartments - Modern Serviced Apartments - Tourists & Professionals - Foto 21
Abbey Apartments - Modern Serviced Apartments - Tourists & Professionals - Foto 22
Abbey Apartments - Modern Serviced Apartments - Tourists & Professionals - Foto 23
Abbey Apartments - Modern Serviced Apartments - Tourists & Professionals - Foto 24
Abbey Apartments - Modern Serviced Apartments - Tourists & Professionals - Foto 25
Abbey Apartments - Modern Serviced Apartments - Tourists & Professionals - Foto 26
Abbey Apartments - Modern Serviced Apartments - Tourists & Professionals - Foto 27
Abbey Apartments - Modern Serviced Apartments - Tourists & Professionals - Foto 28
Abbey Apartments - Modern Serviced Apartments - Tourists & Professionals - Foto 29
Abbey Apartments - Modern Serviced Apartments - Tourists & Professionals - Foto 30
Abbey Apartments - Modern Serviced Apartments - Tourists & Professionals - Foto 31
Abbey Apartments - Modern Serviced Apartments - Tourists & Professionals - Foto 32
Abbey Apartments - Modern Serviced Apartments - Tourists & Professionals - Foto 33
Abbey Apartments - Modern Serviced Apartments - Tourists & Professionals - Foto 34
Abbey Apartments - Modern Serviced Apartments - Tourists & Professionals - Foto 35
Abbey Apartments - Modern Serviced Apartments - Tourists & Professionals - Foto 36
Abbey Apartments - Modern Serviced Apartments - Tourists & Professionals - Foto 37
Abbey Apartments - Modern Serviced Apartments - Tourists & Professionals - Foto 38
Abbey Apartments - Modern Serviced Apartments - Tourists & Professionals - Foto 39
Abbey Apartments - Modern Serviced Apartments - Tourists & Professionals - Foto 40
Abbey Apartments - Modern Serviced Apartments - Tourists & Professionals - Foto 41
Abbey Apartments - Modern Serviced Apartments - Tourists & Professionals - Foto 42
Abbey Apartments - Modern Serviced Apartments - Tourists & Professionals - Foto 43
Abbey Apartments - Modern Serviced Apartments - Tourists & Professionals - Foto 44
Abbey Apartments - Modern Serviced Apartments - Tourists & Professionals - Foto 45
Abbey Apartments - Modern Serviced Apartments - Tourists & Professionals - Foto 46
Abbey Apartments - Modern Serviced Apartments - Tourists & Professionals - Foto 47
Abbey Apartments - Modern Serviced Apartments - Tourists & Professionals - Foto 48
Abbey Apartments - Modern Serviced Apartments - Tourists & Professionals - Foto 49
Abbey Apartments - Modern Serviced Apartments - Tourists & Professionals - Foto 50
Abbey Apartments - Modern Serviced Apartments - Tourists & Professionals - Foto 51
Abbey Apartments - Modern Serviced Apartments - Tourists & Professionals - Foto 52
Abbey Apartments - Modern Serviced Apartments - Tourists & Professionals - Foto 53
Abbey Apartments - Modern Serviced Apartments - Tourists & Professionals - Foto 54
Abbey Apartments - Modern Serviced Apartments - Tourists & Professionals - Foto 55
Abbey Apartments - Modern Serviced Apartments - Tourists & Professionals - Foto 56
Abbey Apartments - Modern Serviced Apartments - Tourists & Professionals - Foto 57
Abbey Apartments - Modern Serviced Apartments - Tourists & Professionals - Foto 58
Abbey Apartments - Modern Serviced Apartments - Tourists & Professionals - Foto 59
Abbey Apartments - Modern Serviced Apartments - Tourists & Professionals - Foto 60
Abbey Apartments - Modern Serviced Apartments - Tourists & Professionals - Foto 61
Abbey Apartments - Modern Serviced Apartments - Tourists & Professionals - Foto 62
Abbey Apartments - Modern Serviced Apartments - Tourists & Professionals - Foto 63
Abbey Apartments - Modern Serviced Apartments - Tourists & Professionals - Foto 64
Abbey Apartments - Modern Serviced Apartments - Tourists & Professionals - Foto 65
Abbey Apartments - Modern Serviced Apartments - Tourists & Professionals - Foto 66
Abbey Apartments - Modern Serviced Apartments - Tourists & Professionals - Foto 67
Abbey Apartments - Modern Serviced Apartments - Tourists & Professionals - Foto 68
Abbey Apartments - Modern Serviced Apartments - Tourists & Professionals - Foto 69
Abbey Apartments - Modern Serviced Apartments - Tourists & Professionals - Foto 70
Abbey Apartments - Modern Serviced Apartments - Tourists & Professionals - Foto 71
Abbey Apartments - Modern Serviced Apartments - Tourists & Professionals - Foto 72
Abbey Apartments - Modern Serviced Apartments - Tourists & Professionals - Foto 73
Abbey Apartments - Modern Serviced Apartments - Tourists & Professionals - Foto 74
Abbey Apartments - Modern Serviced Apartments - Tourists & Professionals - Foto 75
Abbey Apartments - Modern Serviced Apartments - Tourists & Professionals - Foto 76
Abbey Apartments - Modern Serviced Apartments - Tourists & Professionals - Foto 77
Abbey Apartments - Modern Serviced Apartments - Tourists & Professionals - Foto 78
Abbey Apartments - Modern Serviced Apartments - Tourists & Professionals - Foto 79
Abbey Apartments - Modern Serviced Apartments - Tourists & Professionals - Foto 80
Abbey Apartments - Modern Serviced Apartments - Tourists & Professionals - Foto 81
Abbey Apartments - Modern Serviced Apartments - Tourists & Professionals - Foto 82
Abbey Apartments - Modern Serviced Apartments - Tourists & Professionals - Foto 83
Abbey Apartments - Modern Serviced Apartments - Tourists & Professionals - Foto 84
Abbey Apartments - Modern Serviced Apartments - Tourists & Professionals - Foto 85
Abbey Apartments - Modern Serviced Apartments - Tourists & Professionals - Foto 86
Abbey Apartments - Modern Serviced Apartments - Tourists & Professionals - Foto 87
Abbey Apartments - Modern Serviced Apartments - Tourists & Professionals - Foto 88
Abbey Apartments - Modern Serviced Apartments - Tourists & Professionals - Foto 89
Abbey Apartments - Modern Serviced Apartments - Tourists & Professionals - Foto 90
Abbey Apartments - Modern Serviced Apartments - Tourists & Professionals - Foto 91
Abbey Apartments - Modern Serviced Apartments - Tourists & Professionals - Foto 92
Abbey Apartments - Modern Serviced Apartments - Tourists & Professionals - Foto 93
Abbey Apartments - Modern Serviced Apartments - Tourists & Professionals - Foto 94
Abbey Apartments - Modern Serviced Apartments - Tourists & Professionals - Foto 95
Abbey Apartments - Modern Serviced Apartments - Tourists & Professionals - Foto 96
Abbey Apartments - Modern Serviced Apartments - Tourists & Professionals - Foto 97
Abbey Apartments - Modern Serviced Apartments - Tourists & Professionals - Foto 98
Abbey Apartments - Modern Serviced Apartments - Tourists & Professionals - Foto 99
Abbey Apartments - Modern Serviced Apartments - Tourists & Professionals - Foto 100
Abbey Apartments - Modern Serviced Apartments - Tourists & Professionals - Foto 101
Abbey Apartments - Modern Serviced Apartments - Tourists & Professionals - Foto 102
Abbey Apartments - Modern Serviced Apartments - Tourists & Professionals - Foto 103
Abbey Apartments - Modern Serviced Apartments - Tourists & Professionals - Foto 104
Abbey Apartments - Modern Serviced Apartments - Tourists & Professionals - Foto 105
Abbey Apartments - Modern Serviced Apartments - Tourists & Professionals - Foto 106
Abbey Apartments - Modern Serviced Apartments - Tourists & Professionals - Foto 107
Abbey Apartments - Modern Serviced Apartments - Tourists & Professionals - Foto 108
Abbey Apartments - Modern Serviced Apartments - Tourists & Professionals - Foto 109
Abbey Apartments - Modern Serviced Apartments - Tourists & Professionals - Foto 110
Abbey Apartments - Modern Serviced Apartments - Tourists & Professionals - Foto 111
Abbey Apartments - Modern Serviced Apartments - Tourists & Professionals - Foto 112
Abbey Apartments - Modern Serviced Apartments - Tourists & Professionals - Foto 113
Abbey Apartments - Modern Serviced Apartments - Tourists & Professionals - Foto 114
Abbey Apartments - Modern Serviced Apartments - Tourists & Professionals - Foto 115
Abbey Apartments - Modern Serviced Apartments - Tourists & Professionals - Foto 116
Abbey Apartments - Modern Serviced Apartments - Tourists & Professionals - Foto 117
Abbey Apartments - Modern Serviced Apartments - Tourists & Professionals - Foto 118
Abbey Apartments - Modern Serviced Apartments - Tourists & Professionals - Foto 119
Abbey Apartments - Modern Serviced Apartments - Tourists & Professionals - Foto 120
Abbey Apartments - Modern Serviced Apartments - Tourists & Professionals - Foto 121
Abbey Apartments - Modern Serviced Apartments - Tourists & Professionals - Foto 122
Abbey Apartments - Modern Serviced Apartments - Tourists & Professionals - Foto 123
Abbey Apartments - Modern Serviced Apartments - Tourists & Professionals - Foto 124
Abbey Apartments - Modern Serviced Apartments - Tourists & Professionals - Foto 125
Abbey Apartments - Modern Serviced Apartments - Tourists & Professionals - Foto 126
Abbey Apartments - Modern Serviced Apartments - Tourists & Professionals - Foto 127
Abbey Apartments - Modern Serviced Apartments - Tourists & Professionals - Foto 128
Abbey Apartments - Modern Serviced Apartments - Tourists & Professionals - Foto 129
Abbey Apartments - Modern Serviced Apartments - Tourists & Professionals - Foto 130
Abbey Apartments - Modern Serviced Apartments - Tourists & Professionals - Foto 131
Abbey Apartments - Modern Serviced Apartments - Tourists & Professionals - Foto 132
Abbey Apartments - Modern Serviced Apartments - Tourists & Professionals - Foto 133
Abbey Apartments - Modern Serviced Apartments - Tourists & Professionals - Foto 134
Abbey Apartments - Modern Serviced Apartments - Tourists & Professionals - Foto 135
Abbey Apartments - Modern Serviced Apartments - Tourists & Professionals - Foto 136
Abbey Apartments - Modern Serviced Apartments - Tourists & Professionals - Foto 137
Abbey Apartments - Modern Serviced Apartments - Tourists & Professionals - Foto 138
Abbey Apartments - Modern Serviced Apartments - Tourists & Professionals - Foto 139
Abbey Apartments - Modern Serviced Apartments - Tourists & Professionals - Foto 140
Abbey Apartments - Modern Serviced Apartments - Tourists & Professionals - Foto 141
Abbey Apartments - Modern Serviced Apartments - Tourists & Professionals - Foto 142
Abbey Apartments - Modern Serviced Apartments - Tourists & Professionals - Foto 143
Abbey Apartments - Modern Serviced Apartments - Tourists & Professionals - Foto 144
Abbey Apartments - Modern Serviced Apartments - Tourists & Professionals - Foto 145
Abbey Apartments - Modern Serviced Apartments - Tourists & Professionals - Foto 146
Abbey Apartments - Modern Serviced Apartments - Tourists & Professionals - Foto 147
Abbey Apartments - Modern Serviced Apartments - Tourists & Professionals - Foto 148
Abbey Apartments - Modern Serviced Apartments - Tourists & Professionals - Foto 149
Abbey Apartments - Modern Serviced Apartments - Tourists & Professionals - Foto 150
Abbey Apartments - Modern Serviced Apartments - Tourists & Professionals - Foto 151
Abbey Apartments - Modern Serviced Apartments - Tourists & Professionals - Foto 152
Abbey Apartments - Modern Serviced Apartments - Tourists & Professionals - Foto 153
Abbey Apartments - Modern Serviced Apartments - Tourists & Professionals - Foto 154
Abbey Apartments - Modern Serviced Apartments - Tourists & Professionals - Foto 155
Abbey Apartments - Modern Serviced Apartments - Tourists & Professionals - Foto 156
Abbey Apartments - Modern Serviced Apartments - Tourists & Professionals - Foto 157
Abbey Apartments - Modern Serviced Apartments - Tourists & Professionals - Foto 158
Abbey Apartments - Modern Serviced Apartments - Tourists & Professionals - Foto 159
Abbey Apartments - Modern Serviced Apartments - Tourists & Professionals - Foto 160

Abbey Apartments - Modern Serviced Apartments - Tourists & Professionals

Barrow in Furness - Barrow in Furness - Im Zentrum

  • 69 M2
  • 2 Schlafzimmer
  • 4 Personen
  • Heizung
  • Parkplatz
  • Tv
  • Waschmaschine
  • Schornstein
  • Handtücher
  • Bettlaken
9.4Außergewöhnlich | 61 Bewertungen
The Tractor House - Foto 1
The Tractor House - Foto 2
The Tractor House - Foto 3
The Tractor House - Foto 4
The Tractor House - Foto 5
The Tractor House - Foto 6
The Tractor House - Foto 7

The Tractor House

Ulverston - Little Urswick

  • 14 M2
  • 2 Personen
  • Heizung
  • Terrasse
  • Parkplatz
  • Garten
9.9Außergewöhnlich | 20 Bewertungen
Cosy lakeland flat between Bowness & Windermere - Foto 1
Cosy lakeland flat between Bowness & Windermere - Foto 2
Cosy lakeland flat between Bowness & Windermere - Foto 3
Cosy lakeland flat between Bowness & Windermere - Foto 4
Cosy lakeland flat between Bowness & Windermere - Foto 5
Cosy lakeland flat between Bowness & Windermere - Foto 6
Cosy lakeland flat between Bowness & Windermere - Foto 7
Cosy lakeland flat between Bowness & Windermere - Foto 8
Cosy lakeland flat between Bowness & Windermere - Foto 9
Cosy lakeland flat between Bowness & Windermere - Foto 10
Cosy lakeland flat between Bowness & Windermere - Foto 11
Cosy lakeland flat between Bowness & Windermere - Foto 12
Cosy lakeland flat between Bowness & Windermere - Foto 13
Cosy lakeland flat between Bowness & Windermere - Foto 14
Cosy lakeland flat between Bowness & Windermere - Foto 15
Cosy lakeland flat between Bowness & Windermere - Foto 16
Cosy lakeland flat between Bowness & Windermere - Foto 17
Cosy lakeland flat between Bowness & Windermere - Foto 18
Cosy lakeland flat between Bowness & Windermere - Foto 19
Cosy lakeland flat between Bowness & Windermere - Foto 20
Cosy lakeland flat between Bowness & Windermere - Foto 21
Cosy lakeland flat between Bowness & Windermere - Foto 22
Cosy lakeland flat between Bowness & Windermere - Foto 23
Cosy lakeland flat between Bowness & Windermere - Foto 24
Cosy lakeland flat between Bowness & Windermere - Foto 25
Cosy lakeland flat between Bowness & Windermere - Foto 26

Cosy lakeland flat between Bowness & Windermere

Windermere - Windermere

  • 46 M2
  • 1 Schlafzimmer
  • 2 Personen
  • Heizung
  • Terrasse
  • Parkplatz
  • Garten
9.8Außergewöhnlich | 20 Bewertungen
Lakes and Eden Valley. Thornhill Cabin - Foto 1
Lakes and Eden Valley. Thornhill Cabin - Foto 2
Lakes and Eden Valley. Thornhill Cabin - Foto 3
Lakes and Eden Valley. Thornhill Cabin - Foto 4
Lakes and Eden Valley. Thornhill Cabin - Foto 5
Lakes and Eden Valley. Thornhill Cabin - Foto 6
Lakes and Eden Valley. Thornhill Cabin - Foto 7
Lakes and Eden Valley. Thornhill Cabin - Foto 8
Lakes and Eden Valley. Thornhill Cabin - Foto 9
Lakes and Eden Valley. Thornhill Cabin - Foto 10
Lakes and Eden Valley. Thornhill Cabin - Foto 11
Lakes and Eden Valley. Thornhill Cabin - Foto 12
Lakes and Eden Valley. Thornhill Cabin - Foto 13
Lakes and Eden Valley. Thornhill Cabin - Foto 14
Lakes and Eden Valley. Thornhill Cabin - Foto 15
Lakes and Eden Valley. Thornhill Cabin - Foto 16
Lakes and Eden Valley. Thornhill Cabin - Foto 17
Lakes and Eden Valley. Thornhill Cabin - Foto 18
Lakes and Eden Valley. Thornhill Cabin - Foto 19
Lakes and Eden Valley. Thornhill Cabin - Foto 20
Lakes and Eden Valley. Thornhill Cabin - Foto 21
Lakes and Eden Valley. Thornhill Cabin - Foto 22
Lakes and Eden Valley. Thornhill Cabin - Foto 23
Lakes and Eden Valley. Thornhill Cabin - Foto 24
Lakes and Eden Valley. Thornhill Cabin - Foto 25
Lakes and Eden Valley. Thornhill Cabin - Foto 26
Lakes and Eden Valley. Thornhill Cabin - Foto 27
Lakes and Eden Valley. Thornhill Cabin - Foto 28
Lakes and Eden Valley. Thornhill Cabin - Foto 29
Lakes and Eden Valley. Thornhill Cabin - Foto 30
Lakes and Eden Valley. Thornhill Cabin - Foto 31
Lakes and Eden Valley. Thornhill Cabin - Foto 32
Lakes and Eden Valley. Thornhill Cabin - Foto 33
Lakes and Eden Valley. Thornhill Cabin - Foto 34
Lakes and Eden Valley. Thornhill Cabin - Foto 35
Lakes and Eden Valley. Thornhill Cabin - Foto 36
Lakes and Eden Valley. Thornhill Cabin - Foto 37
Lakes and Eden Valley. Thornhill Cabin - Foto 38
Lakes and Eden Valley. Thornhill Cabin - Foto 39
Lakes and Eden Valley. Thornhill Cabin - Foto 40
Lakes and Eden Valley. Thornhill Cabin - Foto 41
Lakes and Eden Valley. Thornhill Cabin - Foto 42
Lakes and Eden Valley. Thornhill Cabin - Foto 43
Lakes and Eden Valley. Thornhill Cabin - Foto 44
Lakes and Eden Valley. Thornhill Cabin - Foto 45
Lakes and Eden Valley. Thornhill Cabin - Foto 46
Lakes and Eden Valley. Thornhill Cabin - Foto 47
Lakes and Eden Valley. Thornhill Cabin - Foto 48
Lakes and Eden Valley. Thornhill Cabin - Foto 49
Lakes and Eden Valley. Thornhill Cabin - Foto 50
Lakes and Eden Valley. Thornhill Cabin - Foto 51
Lakes and Eden Valley. Thornhill Cabin - Foto 52
Lakes and Eden Valley. Thornhill Cabin - Foto 53
Lakes and Eden Valley. Thornhill Cabin - Foto 54
Lakes and Eden Valley. Thornhill Cabin - Foto 55
Lakes and Eden Valley. Thornhill Cabin - Foto 56
Lakes and Eden Valley. Thornhill Cabin - Foto 57
Lakes and Eden Valley. Thornhill Cabin - Foto 58
Lakes and Eden Valley. Thornhill Cabin - Foto 59
Lakes and Eden Valley. Thornhill Cabin - Foto 60
Lakes and Eden Valley. Thornhill Cabin - Foto 61
Lakes and Eden Valley. Thornhill Cabin - Foto 62
Lakes and Eden Valley. Thornhill Cabin - Foto 63
Lakes and Eden Valley. Thornhill Cabin - Foto 64
Lakes and Eden Valley. Thornhill Cabin - Foto 65
Lakes and Eden Valley. Thornhill Cabin - Foto 66
Lakes and Eden Valley. Thornhill Cabin - Foto 67
Lakes and Eden Valley. Thornhill Cabin - Foto 68
Lakes and Eden Valley. Thornhill Cabin - Foto 69
Lakes and Eden Valley. Thornhill Cabin - Foto 70
Lakes and Eden Valley. Thornhill Cabin - Foto 71
Lakes and Eden Valley. Thornhill Cabin - Foto 72
Lakes and Eden Valley. Thornhill Cabin - Foto 73
Lakes and Eden Valley. Thornhill Cabin - Foto 74
Lakes and Eden Valley. Thornhill Cabin - Foto 75
Lakes and Eden Valley. Thornhill Cabin - Foto 76
Lakes and Eden Valley. Thornhill Cabin - Foto 77
Lakes and Eden Valley. Thornhill Cabin - Foto 78
Lakes and Eden Valley. Thornhill Cabin - Foto 79

Lakes and Eden Valley. Thornhill Cabin

Appleby in Westmorland - Long

  • 2 M2
  • 2 Personen
  • Heizung
  • Terrasse
  • Parkplatz
  • Garten
  • Barbecue
9.8Außergewöhnlich | 160 Bewertungen
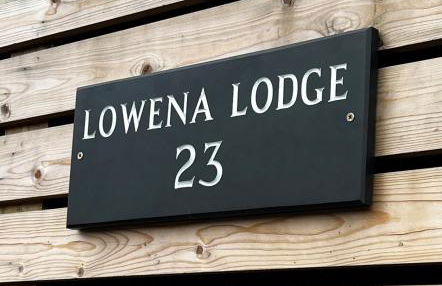
Lowena Lodge - Foto 1
Lowena Lodge - Foto 2
Lowena Lodge - Foto 3
Lowena Lodge - Foto 4
Lowena Lodge - Foto 5
Lowena Lodge - Foto 6
Lowena Lodge - Foto 7
Lowena Lodge - Foto 8
Lowena Lodge - Foto 9
Lowena Lodge - Foto 10
Lowena Lodge - Foto 11
Lowena Lodge - Foto 12
Lowena Lodge - Foto 13
Lowena Lodge - Foto 14
Lowena Lodge - Foto 15
Lowena Lodge - Foto 16
Lowena Lodge - Foto 17
Lowena Lodge - Foto 18
Lowena Lodge - Foto 19
Lowena Lodge - Foto 20
Lowena Lodge - Foto 21
Lowena Lodge - Foto 22
Lowena Lodge - Foto 23
Lowena Lodge - Foto 24
Lowena Lodge - Foto 25
Lowena Lodge - Foto 26
Lowena Lodge - Foto 27
Lowena Lodge - Foto 28
Lowena Lodge - Foto 29
Lowena Lodge - Foto 30
Lowena Lodge - Foto 31
Lowena Lodge - Foto 32
Lowena Lodge - Foto 33
Lowena Lodge - Foto 34
Lowena Lodge - Foto 35
Lowena Lodge - Foto 36
Lowena Lodge - Foto 37
Lowena Lodge - Foto 38
Lowena Lodge - Foto 39

Lowena Lodge

Windermere - Troutbeck

  • 280 M2
  • 2 Schlafzimmer
  • 4 Personen
  • Heizung
  • Terrasse
  • Parkplatz
  • Garten
  • Barbecue
9.8Außergewöhnlich | 34 Bewertungen
*Luxury Apartment 2min from City - Foto 1
*Luxury Apartment 2min from City - Foto 2
*Luxury Apartment 2min from City - Foto 3
*Luxury Apartment 2min from City - Foto 4
*Luxury Apartment 2min from City - Foto 5
*Luxury Apartment 2min from City - Foto 6
*Luxury Apartment 2min from City - Foto 7
*Luxury Apartment 2min from City - Foto 8
*Luxury Apartment 2min from City - Foto 9
*Luxury Apartment 2min from City - Foto 10
*Luxury Apartment 2min from City - Foto 11
*Luxury Apartment 2min from City - Foto 12
*Luxury Apartment 2min from City - Foto 13
*Luxury Apartment 2min from City - Foto 14
*Luxury Apartment 2min from City - Foto 15
*Luxury Apartment 2min from City - Foto 16
*Luxury Apartment 2min from City - Foto 17
*Luxury Apartment 2min from City - Foto 18
*Luxury Apartment 2min from City - Foto 19
*Luxury Apartment 2min from City - Foto 20
*Luxury Apartment 2min from City - Foto 21
*Luxury Apartment 2min from City - Foto 22
*Luxury Apartment 2min from City - Foto 23
*Luxury Apartment 2min from City - Foto 24

*Luxury Apartment 2min from City

Carlisle - Carlisle - 1.7 km vom Zentrum

  • 76 M2
  • 2 Schlafzimmer
  • 4 Personen
  • Heizung
  • Parkplatz
  • Fahrstuhl
9.8Außergewöhnlich | 17 Bewertungen
The Townhouses @ Carus Green - Foto 1
The Townhouses @ Carus Green - Foto 2
The Townhouses @ Carus Green - Foto 3
The Townhouses @ Carus Green - Foto 4
The Townhouses @ Carus Green - Foto 5
The Townhouses @ Carus Green - Foto 6
The Townhouses @ Carus Green - Foto 7
The Townhouses @ Carus Green - Foto 8
The Townhouses @ Carus Green - Foto 9
The Townhouses @ Carus Green - Foto 10
The Townhouses @ Carus Green - Foto 11
The Townhouses @ Carus Green - Foto 12
The Townhouses @ Carus Green - Foto 13
The Townhouses @ Carus Green - Foto 14
The Townhouses @ Carus Green - Foto 15
The Townhouses @ Carus Green - Foto 16
The Townhouses @ Carus Green - Foto 17
The Townhouses @ Carus Green - Foto 18
The Townhouses @ Carus Green - Foto 19
The Townhouses @ Carus Green - Foto 20
The Townhouses @ Carus Green - Foto 21
The Townhouses @ Carus Green - Foto 22
The Townhouses @ Carus Green - Foto 23
The Townhouses @ Carus Green - Foto 24
The Townhouses @ Carus Green - Foto 25
The Townhouses @ Carus Green - Foto 26
The Townhouses @ Carus Green - Foto 27
The Townhouses @ Carus Green - Foto 28
The Townhouses @ Carus Green - Foto 29
The Townhouses @ Carus Green - Foto 30
The Townhouses @ Carus Green - Foto 31
The Townhouses @ Carus Green - Foto 32
The Townhouses @ Carus Green - Foto 33
The Townhouses @ Carus Green - Foto 34
The Townhouses @ Carus Green - Foto 35
The Townhouses @ Carus Green - Foto 36
The Townhouses @ Carus Green - Foto 37
The Townhouses @ Carus Green - Foto 38
The Townhouses @ Carus Green - Foto 39
The Townhouses @ Carus Green - Foto 40
The Townhouses @ Carus Green - Foto 41
The Townhouses @ Carus Green - Foto 42
The Townhouses @ Carus Green - Foto 43
The Townhouses @ Carus Green - Foto 44
The Townhouses @ Carus Green - Foto 45
The Townhouses @ Carus Green - Foto 46
The Townhouses @ Carus Green - Foto 47
The Townhouses @ Carus Green - Foto 48
The Townhouses @ Carus Green - Foto 49
The Townhouses @ Carus Green - Foto 50
The Townhouses @ Carus Green - Foto 51
The Townhouses @ Carus Green - Foto 52
The Townhouses @ Carus Green - Foto 53
The Townhouses @ Carus Green - Foto 54
The Townhouses @ Carus Green - Foto 55
The Townhouses @ Carus Green - Foto 56
The Townhouses @ Carus Green - Foto 57
The Townhouses @ Carus Green - Foto 58
The Townhouses @ Carus Green - Foto 59
The Townhouses @ Carus Green - Foto 60
The Townhouses @ Carus Green - Foto 61
The Townhouses @ Carus Green - Foto 62
The Townhouses @ Carus Green - Foto 63
The Townhouses @ Carus Green - Foto 64
The Townhouses @ Carus Green - Foto 65
The Townhouses @ Carus Green - Foto 66
The Townhouses @ Carus Green - Foto 67
The Townhouses @ Carus Green - Foto 68
The Townhouses @ Carus Green - Foto 69
The Townhouses @ Carus Green - Foto 70
The Townhouses @ Carus Green - Foto 71
The Townhouses @ Carus Green - Foto 72
The Townhouses @ Carus Green - Foto 73
The Townhouses @ Carus Green - Foto 74
The Townhouses @ Carus Green - Foto 75
The Townhouses @ Carus Green - Foto 76
The Townhouses @ Carus Green - Foto 77
The Townhouses @ Carus Green - Foto 78
The Townhouses @ Carus Green - Foto 79
The Townhouses @ Carus Green - Foto 80
The Townhouses @ Carus Green - Foto 81
The Townhouses @ Carus Green - Foto 82
The Townhouses @ Carus Green - Foto 83
The Townhouses @ Carus Green - Foto 84
The Townhouses @ Carus Green - Foto 85
The Townhouses @ Carus Green - Foto 86
The Townhouses @ Carus Green - Foto 87
The Townhouses @ Carus Green - Foto 88
The Townhouses @ Carus Green - Foto 89
The Townhouses @ Carus Green - Foto 90
The Townhouses @ Carus Green - Foto 91
The Townhouses @ Carus Green - Foto 92
The Townhouses @ Carus Green - Foto 93
The Townhouses @ Carus Green - Foto 94
The Townhouses @ Carus Green - Foto 95
The Townhouses @ Carus Green - Foto 96
The Townhouses @ Carus Green - Foto 97
The Townhouses @ Carus Green - Foto 98
The Townhouses @ Carus Green - Foto 99
The Townhouses @ Carus Green - Foto 100
The Townhouses @ Carus Green - Foto 101
The Townhouses @ Carus Green - Foto 102
The Townhouses @ Carus Green - Foto 103
The Townhouses @ Carus Green - Foto 104
The Townhouses @ Carus Green - Foto 105
The Townhouses @ Carus Green - Foto 106
The Townhouses @ Carus Green - Foto 107
The Townhouses @ Carus Green - Foto 108
The Townhouses @ Carus Green - Foto 109
The Townhouses @ Carus Green - Foto 110
The Townhouses @ Carus Green - Foto 111
The Townhouses @ Carus Green - Foto 112
The Townhouses @ Carus Green - Foto 113
The Townhouses @ Carus Green - Foto 114
The Townhouses @ Carus Green - Foto 115
The Townhouses @ Carus Green - Foto 116
The Townhouses @ Carus Green - Foto 117
The Townhouses @ Carus Green - Foto 118
The Townhouses @ Carus Green - Foto 119
The Townhouses @ Carus Green - Foto 120
The Townhouses @ Carus Green - Foto 121
The Townhouses @ Carus Green - Foto 122
The Townhouses @ Carus Green - Foto 123
The Townhouses @ Carus Green - Foto 124
The Townhouses @ Carus Green - Foto 125
The Townhouses @ Carus Green - Foto 126
The Townhouses @ Carus Green - Foto 127
The Townhouses @ Carus Green - Foto 128
The Townhouses @ Carus Green - Foto 129
The Townhouses @ Carus Green - Foto 130
The Townhouses @ Carus Green - Foto 131
The Townhouses @ Carus Green - Foto 132
The Townhouses @ Carus Green - Foto 133
The Townhouses @ Carus Green - Foto 134
The Townhouses @ Carus Green - Foto 135
The Townhouses @ Carus Green - Foto 136
The Townhouses @ Carus Green - Foto 137
The Townhouses @ Carus Green - Foto 138
The Townhouses @ Carus Green - Foto 139
The Townhouses @ Carus Green - Foto 140
The Townhouses @ Carus Green - Foto 141
The Townhouses @ Carus Green - Foto 142
The Townhouses @ Carus Green - Foto 143
The Townhouses @ Carus Green - Foto 144
The Townhouses @ Carus Green - Foto 145
The Townhouses @ Carus Green - Foto 146

The Townhouses @ Carus Green

Kendal - Kendal

  • 84 M2
  • 4 Schlafzimmer
  • 9 Personen
  • Heizung
  • Parkplatz
  • Garten
  • Tv
  • Waschmaschine
  • Handtücher
  • Bettlaken
10Hervorragend | 7 Bewertungen
Stunning 2-bedroomed Cottage - Foto 1
Stunning 2-bedroomed Cottage - Foto 2
Stunning 2-bedroomed Cottage - Foto 3
Stunning 2-bedroomed Cottage - Foto 4
Stunning 2-bedroomed Cottage - Foto 5
Stunning 2-bedroomed Cottage - Foto 6
Stunning 2-bedroomed Cottage - Foto 7
Stunning 2-bedroomed Cottage - Foto 8
Stunning 2-bedroomed Cottage - Foto 9
Stunning 2-bedroomed Cottage - Foto 10
Stunning 2-bedroomed Cottage - Foto 11
Stunning 2-bedroomed Cottage - Foto 12
Stunning 2-bedroomed Cottage - Foto 13
Stunning 2-bedroomed Cottage - Foto 14
Stunning 2-bedroomed Cottage - Foto 15
Stunning 2-bedroomed Cottage - Foto 16
Stunning 2-bedroomed Cottage - Foto 17
Stunning 2-bedroomed Cottage - Foto 18
Stunning 2-bedroomed Cottage - Foto 19
Stunning 2-bedroomed Cottage - Foto 20
Stunning 2-bedroomed Cottage - Foto 21
Stunning 2-bedroomed Cottage - Foto 22
Stunning 2-bedroomed Cottage - Foto 23
Stunning 2-bedroomed Cottage - Foto 24
Stunning 2-bedroomed Cottage - Foto 25
Stunning 2-bedroomed Cottage - Foto 26
Stunning 2-bedroomed Cottage - Foto 27
Stunning 2-bedroomed Cottage - Foto 28
Stunning 2-bedroomed Cottage - Foto 29
Stunning 2-bedroomed Cottage - Foto 30
Stunning 2-bedroomed Cottage - Foto 31
Stunning 2-bedroomed Cottage - Foto 32
Stunning 2-bedroomed Cottage - Foto 33
Stunning 2-bedroomed Cottage - Foto 34
Stunning 2-bedroomed Cottage - Foto 35
Stunning 2-bedroomed Cottage - Foto 36
Stunning 2-bedroomed Cottage - Foto 37
Stunning 2-bedroomed Cottage - Foto 38
Stunning 2-bedroomed Cottage - Foto 39
Stunning 2-bedroomed Cottage - Foto 40
Stunning 2-bedroomed Cottage - Foto 41
Stunning 2-bedroomed Cottage - Foto 42
Stunning 2-bedroomed Cottage - Foto 43
Stunning 2-bedroomed Cottage - Foto 44
Stunning 2-bedroomed Cottage - Foto 45
Stunning 2-bedroomed Cottage - Foto 46
Stunning 2-bedroomed Cottage - Foto 47
Stunning 2-bedroomed Cottage - Foto 48
Stunning 2-bedroomed Cottage - Foto 49
Stunning 2-bedroomed Cottage - Foto 50
Stunning 2-bedroomed Cottage - Foto 51
Stunning 2-bedroomed Cottage - Foto 52
Stunning 2-bedroomed Cottage - Foto 53
Stunning 2-bedroomed Cottage - Foto 54
Stunning 2-bedroomed Cottage - Foto 55
Stunning 2-bedroomed Cottage - Foto 56
Stunning 2-bedroomed Cottage - Foto 57
Stunning 2-bedroomed Cottage - Foto 58
Stunning 2-bedroomed Cottage - Foto 59
Stunning 2-bedroomed Cottage - Foto 60
Stunning 2-bedroomed Cottage - Foto 61
Stunning 2-bedroomed Cottage - Foto 62

Stunning 2-bedroomed Cottage

Cockermouth - Brandlingill

  • 125 M2
  • 2 Schlafzimmer
  • 4 Personen
  • Heizung
  • Parkplatz
  • Garten
  • Tv
  • Schornstein
  • Handtücher
  • Bettlaken
10Hervorragend | 6 Bewertungen

Verwandte Reiseziele